


How to Fix the Moisture Sensor Bars on a Dryer With a Bad Timer
The sensor bars, also known as moisture sensors, detect the moisture levels of your clothes. If they are dirty or damaged, they may not accurately read the moisture level and/or fail to communicate with the sensor board. The result is that your dryer may continue running even when the clothes are dry or may stop running and leave them damp. Both can result in the timer not advancing to the next cycle as well.
To determine if the sensor bars are faulty, you will need to inspect them visually. If the sensor bars are dirty, you can try cleaning them with some rubbing alcohol and a soft cloth. These bars can also be damaged from regular wear and tear. We’ve prepared this simple guide to walk you through finding the bars and replacing them if necessary. However, if your dryer is displaying an error code, you will need to put the dryer into diagnostic mode and follow the instructions in your dryer manual.
What are Moisture Sensor Bars?
In electric dryers, a control board, also known as a circuit board, is responsible for controlling the dryer’s functions such as temperature and timer settings. The control board takes inputs from the user’s cycle selections and works in conjunction with the relay board, which is a separate part of the dryer, to make the dryer work. If the relay board is not receiving any signals to run the motor or to turn on the heater, then the control board may be at fault.
FIX TIP
Where are the Moisture Sensor Bars Located?
The control board is normally located in the dryer’s main control panel.
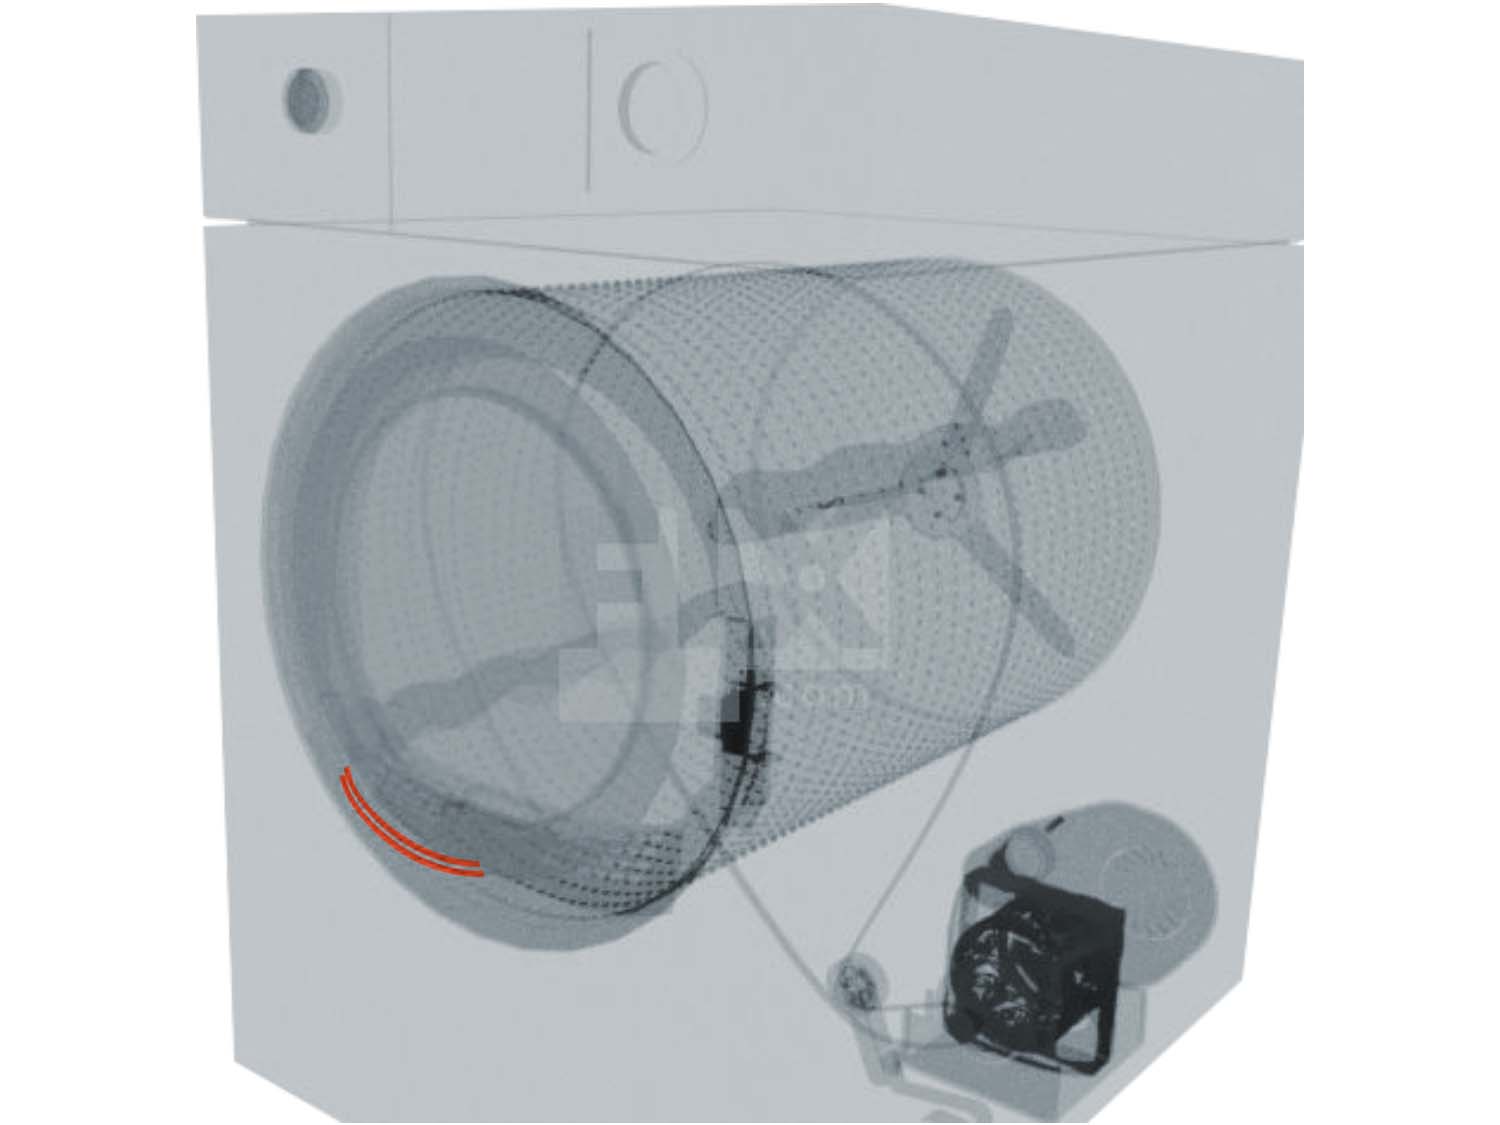
General Location of the Moisture Sensor Bars in a Dryer
How To Access, Remove, and Inspect the Moisture Sensor Bars in a Dryer
- To prevent electrical hazards, shut off the power supply to your dryer.
- Remove the main top of your dryer.
- Detach the front panel to access the drum; you may need to disconnect the wires for your lid switch to do this.
- Set the control panel aside to access the terminals for the moisture sensor. Depending on your model, you may need to remove the back panel of your dryer to access the terminal.
- Remove the wires connected to the terminal of the sensor.
- From the front of the dryer, pull out the sensor.
- If there is waxy buildup on the sensor bars, wipe it clean with rubbing alcohol. This may be the cause of your dryer malfunctioning.
- If the sensor bars are clean, inspect the sensor for any damage. If the sensor is damaged, it will need to be replaced.
- If there is no damage, you will need to test the sensor with a multimeter. It should not have continuity. If it does, it may have short-circuited and will need to be replaced.
How to Test the Moisture Sensor Bars
- Set your multimeter to continuity test mode.
- Touch one probe of the multimeter to one of the sensor bars and the other probe to the other sensor bar. You should get a reading of continuity if the sensor bars are working properly.
- If you don’t get a reading of continuity, you should check the wiring connections to make sure they are secure and clean.
- If the wiring connections are fine and you still don't get a reading of continuity, then the sensor bars are faulty and need to be replaced.
How to Install New Moisture Sensor Bars
- Check “How to Access, Remove, and Inspect the Sensor Bars in a Dryer”, for instructions on how to remove the sensor bars.
- Take the new sensor and place it inside the sensor pad/housing.
- Place the sensor back inside the machine and secure it in place.
- Attach the wire connectors to the new terminal of the sensor.
- Put the front panel back on the machine.
- Place the main top back on and attach the console.
- Fit the rear panel back on if you removed it.
- Plug your machine in, and your repair is complete.
Next: Troubleshooting the Moisture Board
Go To Main Page: Timer Not Working