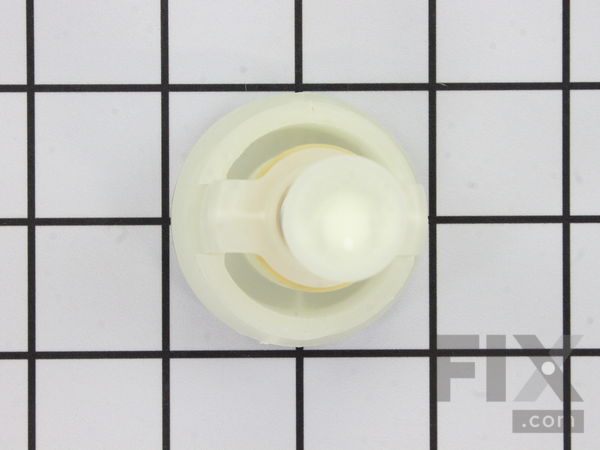
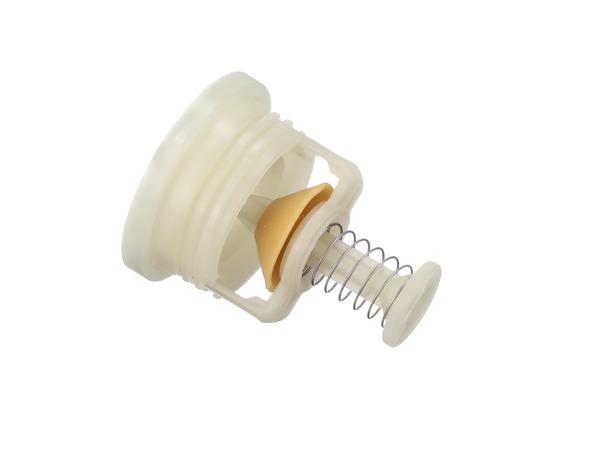
Dishwasher Piston And Nut Assembly WD24X10018
$24.25
In Stock
- Fix Number:
- FIX260690
- Manufacturer #:
- WD24X10018
- Manufactured by:
- GE
Jump to:
Product Description
This is used for the check valve.
-
Works with the following brands:General Electric, Kenmore, Hotpoint, Amana
-
Works with the following products:Dishwasher
-
Fixes the following symptoms:Not draining, Not cleaning dishes properly, Leaking
-
Part# WD24X10018 replaces these:AP2617344, 821081, WD22X133, WD24X199, WD24X220
- Works with the following brands:
- General Electric, Kenmore, Hotpoint, Amana
- Works with the following products
- Dishwasher
- Fixes the following symptoms
- Not draining, Not cleaning dishes properly, Leaking
- Part# WD24X10018 replaces these:
- AP2617344, 821081, WD22X133, WD24X199, WD24X220
Part Number Cross Reference
Videos For installing this part.
Replacing your Dishwasher Piston And Nut Assembly

Questions and Answers
Be the first to ask our experts a question about this part!
Ask a Question
Ask our experts a question on this part and we'll respond as soon as we can.
Sorry, we couldn't find a match for "".
Here's a guide for finding your model number.
Something went wrong. Please try again later.
Your Question Has Been Submitted!
Our experts will send you an email as soon as your question has been answered.
Related Parts Additional or alternate parts to consider.
View More
View Less
Installation Instructions Provided by Fix customers like you.
- < Prev
- 1
- 2
- Next >
Sort by:
Search filter:
Clear Filter
Your search term must have 3 or more characters.
Keep searches simple. Use keywords, e.g. "leaking", "pump", "broken" or "fit".
Sorry, we couldn't find any existing installation instruction that matched.
- Customer:
- Ivan from SPRINGFIELD, VA
- Parts Used:
- WD12X10327, WD24X10018, WD08X10015
- Difficulty Level:
- Really Easy
- Total Repair Time:
- 30 - 60 mins
Dishwasher stopped flushing water
First, emptied the dishwasher of all items and water.
Second, checked to see if there were any clogs.
Third, found make and model of the dishwasher and looked it up in Fix.com
Fourth, found the issue - drainplug needed replacing.
Fifth, ordered the correct OEM parts.
Sixth, installed and tested - works like new.
Second, checked to see if there were any clogs.
Third, found make and model of the dishwasher and looked it up in Fix.com
Fourth, found the issue - drainplug needed replacing.
Fifth, ordered the correct OEM parts.
Sixth, installed and tested - works like new.
5 of 17 people
found this instruction helpful.
Was this instruction helpful to you?
Thank you for voting!
- Customer:
- Dino from Ashburn, VA
- Parts Used:
- WD24X10018
- Difficulty Level:
- Really Easy
- Total Repair Time:
- Less than 15 mins
- Tools:
- Nutdriver, Pliers
Dishwasher wouldn't drain
Very easy to accomplish. Took off the back screen and removed piston nut assembly with some pliers. It just screws out. Installed the new part and reinstalled the screen and it works like new!
1 person
found this instruction helpful.
Was this instruction helpful to you?
Thank you for voting!
- Customer:
- Randy from Wylie, TX
- Parts Used:
- WD8X228, WD8X227, WD24X10018
- Difficulty Level:
- Easy
- Total Repair Time:
- 1- 2 hours
- Tools:
- Screw drivers, Socket set, Wrench (Adjustable)
Dishwasher was not draining completely.
Remove the bottom rack. Put a block under the front edge of the opened door to keep the pressure off the hinges as I worked. I removed the two screws holding the cover inlet (506) and removed the cover sump (509) and the filter sump (508). I took a screwdriver to pry up the washers that secured the large screen just below the heating e
... Read more
lement. I removed the standing water with a wet vacuum and cleaned the sump and inlet parts. Removed the right screw that held the supt calrod (112). Removed the two screws that held the filter frame (543) and unscrewed the piston and nut assembly (564) which was completed deteriorated. Installed the new piston and nut and replaced all the pieces removed earlier. Removed the corner tub baffles (26) and replaced with new ones. I did not use the valve body gasket. The dishwasher is working perfectly after multiple uses.
Read less
1 person
found this instruction helpful.
Was this instruction helpful to you?
Thank you for voting!
- Customer:
- Douglas from Bandera, TX
- Parts Used:
- WD28X31819, WD28X31820, WD12X10304, WD8X228, WD8X227, WD24X10018
- Difficulty Level:
- Easy
- Total Repair Time:
- 30 - 60 mins
- Tools:
- Screw drivers, Socket set
dishes weren't coming out clean
Researched the internet and found parts supplier who had the replacement parts suggested and how to videos. Only difficulty was the old piston & nut assembly which was "frozen tight in place". Had to muscle it out. Rest of repair couldn't have been much easier. Once old parts were replaced, dishes seem to be coming out better. For now thi
... Read more
s beat spending $$ for a new dishwasher.
Read less
1 person
found this instruction helpful.
Was this instruction helpful to you?
Thank you for voting!
- Customer:
- Michael from Oak Creek, WI
- Parts Used:
- WD24X10018
- Difficulty Level:
- Very Easy
- Total Repair Time:
- Less than 15 mins
- Tools:
- Nutdriver, Pliers
After total cycle was complete, there was a large volumn of water in bottom of dishwasher.
Removed 4 screws from rear cover inside washer. Gently removed check valve with a pliers. Found the check valve seat had failed and was completely gone. Checked discharge opening for debris. There was none. Gently tightened new valve with pliers and reinstalled cover. Ran complete cycle - problem solved, no residual water in bottom o
... Read more
f dishwasher.
Read less
0 of 1 people
found this instruction helpful.
Was this instruction helpful to you?
Thank you for voting!
- Customer:
- Greg from Vallejo, CA
- Parts Used:
- WD8X219, WD26X10013, WD24X10018, WD22X10024
- Difficulty Level:
- Easy
- Total Repair Time:
- More than 2 hours
- Tools:
- Nutdriver, Pliers, Wrench (Adjustable)
Not Draining and leaking from flow diverter solenoid
The instruction videos on the site were well done. The only real addition I wanted to add here, is that the repair itself only took an hour. The reason I listed it as taking more than 2 hours was due to the amount of time it took to clean the build up of calcium and hardened soap from the various areas. Keep this in mind when doing your o
... Read more
wn repair. Removing and replacing the parts was quick and painless. Cleaning the crud was time consuming.
Read less
0 of 1 people
found this instruction helpful.
Was this instruction helpful to you?
Thank you for voting!
- Customer:
- Art from Macungie, PA
- Parts Used:
- WD24X10018
- Difficulty Level:
- Very Easy
- Total Repair Time:
- Less than 15 mins
- Tools:
- Nutdriver, Pliers
Water does not drain entirly from Dishwasher
Removed three screws from rear basket. Unscrewed existing valve. Needed to use a channel locks to loosen using the tabs on the valve. Installed new valve. Hand tighten then one 1/8 of a turn to tighten. Don't tighted to much. Ran a full load and checked after completed cycle. Did not fix the problem. Water still remains. I realise tha
... Read more
t the suggested part had only a little better than 50% success rate.
Read less
0 of 1 people
found this instruction helpful.
Was this instruction helpful to you?
Thank you for voting!
- Customer:
- Sue from Shirley, AR
- Parts Used:
- WD24X10018
- Difficulty Level:
- Very Easy
- Total Repair Time:
- Less than 15 mins
- Tools:
- Screw drivers
Dishwasher was no longer draining
Drained standing water using a shop vac. Took out all screens in the bottom, cleaned out as much "gunk" as I could. Saw the mangled Piston and Nut Assembly. Found the part on line. When the order came in, replaced the part. Very easy and worked like a charm! MUCH better than replacing our old dishwasher. All it took was a screwdriv
... Read more
er, you can do it. I did it while my husband was at his fire dept. meeting!
Read less
0 of 1 people
found this instruction helpful.
Was this instruction helpful to you?
Thank you for voting!
- Customer:
- Tom from Boise, ID
- Parts Used:
- WD24X10018
- Difficulty Level:
- Really Easy
- Total Repair Time:
- Less than 15 mins
- Tools:
- Nutdriver, Pliers
"Slow Drain" error
Simple job! Remove 4 1/4" hex-headed screws at the back, un-screw the old part (pliers may be needed) and install the new one. The replace the cover and 4 screws.
0 of 1 people
found this instruction helpful.
Was this instruction helpful to you?
Thank you for voting!
- Customer:
- Tomas from Temecula, CA
- Parts Used:
- WD24X10018
- Difficulty Level:
- A Bit Difficult
- Total Repair Time:
- 1- 2 hours
- Tools:
- Nutdriver, Pliers, Socket set, Wrench (Adjustable)
Washer does not drain entirely
Ordered part #WD24X10018, piston and nut assembly. As advised., tried to unscrew 4 screws to remove part. 2 screws were no problem, the other two were just under and in line with what looks like heating tubing. Had to loosen same in order to remove the other two.. Could not remove piston, as it was frozen. Luckily I had Nav
... Read more
al Jelly rust dissolver, whichI I applied and left over night, which did the trick. I replaced the part butIi still have 1/2" water standing. Now what do I replace?.....Tom P.S. washer has hardly been used??
Read less
0 of 1 people
found this instruction helpful.
Was this instruction helpful to you?
Thank you for voting!
- < Prev
- 1
- 2
- Next >
Model Compatibility
This part works with the following models:
Fix Number: FIX260690
Manufacturer Part Number: WD24X10018
Manufacturer Part Number: WD24X10018
| Brand | Model Number | Description |
|---|---|---|
| Kenmore | 36314231100 | Dishwasher |
| Kenmore | 36314232100 | Dishwasher |
| Kenmore | 36314234100 | Dishwasher |
| Kenmore | 36314238100 | Dishwasher |
| Kenmore | 36314239100 | Dishwasher |
| Kenmore | 36314251100 | Dishwasher |
| Kenmore | 36314252100 | Dishwasher |
| Kenmore | 36314254100 | Dishwasher |
| Kenmore | 36314259100 | Dishwasher |
| Kenmore | 36314382000 | Dishwasher |
| Kenmore | 36314387000 | Dishwasher |
| Kenmore | 36314389000 | Dishwasher |
| Kenmore | 36314482100 | Dishwasher |
| Kenmore | 36314484100 | Dishwasher |
| Kenmore | 36314487100 | Dishwasher |
| Kenmore | 36314489100 | Dishwasher |
| Kenmore | 36314572000 | Dishwasher |
| Kenmore | 36314573000 | Dishwasher |
| Kenmore | 36314577000 | Dishwasher |
| Kenmore | 36314579000 | Dishwasher |
| Kenmore | 36314582100 | Dishwasher |
| Kenmore | 36314584100 | Dishwasher |
| Kenmore | 36314587100 | Dishwasher |
| Kenmore | 36314589100 | Dishwasher |
| Kenmore | 36314672100 | Dishwasher |
| Kenmore | 36314673100 | Dishwasher |
| Kenmore | 36314674100 | Dishwasher |
| Kenmore | 36314679100 | Dishwasher |
| Kenmore | 36314772100 | Dishwasher |
| Kenmore | 36314773100 | Dishwasher |
Mail-In Recycling Rebate
Some of the parts we sell are eligible for mail-in rebates since we can recycle them. We will display any applicable rebates in your shopping cart. To redeem your rebate, contact Customer Service after you have received your part.


