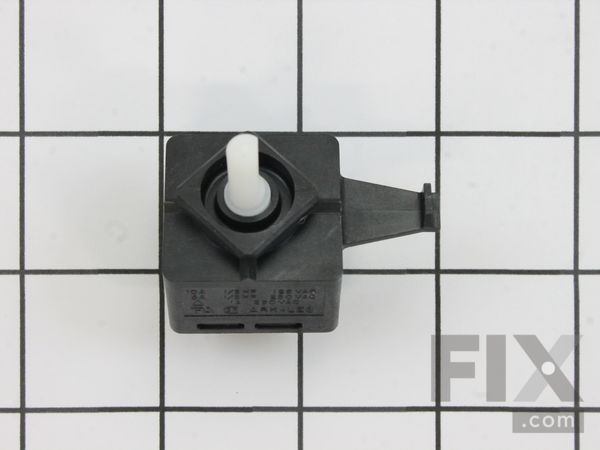
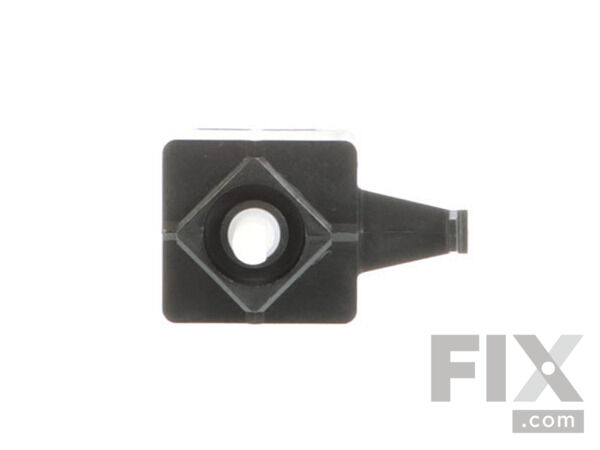
Dryer Push-To-Start Switch WP3395382
$43.97
In Stock
- Fix Number:
- FIX11741476
- Manufacturer #:
- WP3395382
- Manufactured by:
- Whirlpool
Jump to:
Product Description
This part is used to start the dryer once you have selected a setting on the timer.
-
Works with the following brands:Kenmore, Whirlpool, Roper, Estate
-
Works with the following products:Dryer, Washer Dryer Combo
-
Fixes the following symptoms:Won’t Start
-
Part# WP3395382 replaces these:AP6008341, 3395382
- Works with the following brands:
- Kenmore, Whirlpool, Roper, Estate
- Works with the following products
- Dryer, Washer Dryer Combo
- Fixes the following symptoms
- Won’t Start
- Part# WP3395382 replaces these:
- AP6008341, 3395382
Part Number Cross Reference
Videos For installing this part.
Replacing your Dryer Push-To-Start Switch

Questions and Answers
Be the first to ask our experts a question about this part!
Ask a Question
Ask our experts a question on this part and we'll respond as soon as we can.
Sorry, we couldn't find a match for "".
Here's a guide for finding your model number.
Something went wrong. Please try again later.
Your Question Has Been Submitted!
Our experts will send you an email as soon as your question has been answered.
Related Parts Additional or alternate parts to consider.
View More
View Less
Installation Instructions Provided by Fix customers like you.
- < Prev
- 1
- Next >
Sort by:
Search filter:
Clear Filter
Your search term must have 3 or more characters.
Keep searches simple. Use keywords, e.g. "leaking", "pump", "broken" or "fit".
Sorry, we couldn't find any existing installation instruction that matched.
Dryer would not turn on.
3 days before Christmas dryer dies, I pulled up Partselect website, I watched a few videos and ordered the parts they listed. I also called to get see what a service charge would cost, $80.00 without parts?? Forget that, I spent under $50.00 for 3 parts, I used the two listed and boom it was fixed, I kept the 3rd part for a rainy day, I u
... Read more
sed the vac to clean up the extra lint that gets behind the panel, they saved my X-Mas budget and year, thanks for the great video and fast shipping.Tony in Texas!!
Read less
3 of 4 people
found this instruction helpful.
Was this instruction helpful to you?
Thank you for voting!
dryer started running without pressing start button
Lots of people have described how easy it is to replace this part, but they made the assumption you knew how to get the end caps off. I'm such a newbie, I wasted alot of time figuring that out. Here's a link to the video that showed me how super simple that is: https://www.youtube.com/watch?v=e6cMej-C1XQ Just get your fingernails in
... Read more
to the top edge of the plastic end caps and pull toward you to pop them off. The two Philips head screws that hold the control panel are located at the bottom of the area hidden by those end caps. Remove these. Remove the start button by gently pulling it toward you. You can now pull the bottom of the control panel toward you and flip it up on its hinges and out of your way. The start switch is held in place by a small plastic arm. Pry up this arm, and gently turn the switch a quarter turn to release it from the panel. So I didn't confuse which wire goes where, I only removed one wire from the old switch at a time, connecting that wire to the new switch before I unplugged the other wire. Pull the wire adapter off by grasping its metal neck with a pair of needle-nosed pliers. Put the new switch in the panel's hole, giving it that quarter turn that will allow that plastic arm to fall into its hole. Lower the control panel back down, making sure that the little feet on the bottom are back in their holes. Replace those two screws, noting that they go in at a 45 degree angle toward the back, not just straight down. Pop the end caps back on, and slide the start button back on (pay attention to aligning the flat side of spindle with flat side of the knob's interior. Done! (Took a lot less time to do it than to write this!)
Read less
2 of 3 people
found this instruction helpful.
Was this instruction helpful to you?
Thank you for voting!
- Customer:
- Paul from Winston-Salem, NC
- Parts Used:
- WP3395382
- Difficulty Level:
- Really Easy
- Total Repair Time:
- Less than 15 mins
- Tools:
- Wrench set
replaced start switch
replaced switch
0 of 1 people
found this instruction helpful.
Was this instruction helpful to you?
Thank you for voting!
Dryer would not start
I removed the start button and opened it up. The contact points were badly burned. After looking on the internet I decided to order the start button and also the thermal fuse because a faulty start button can cause the thermal fuse to go out. after receiving the parts, I was able to install the parts in less than a half hour. The dryer st
... Read more
arted up and I was done.
Read less
0 of 1 people
found this instruction helpful.
Was this instruction helpful to you?
Thank you for voting!
- < Prev
- 1
- Next >
Model Compatibility
This part works with the following models:
Fix Number: FIX11741476
Manufacturer Part Number: WP3395382
Manufacturer Part Number: WP3395382
| Brand | Model Number | Description |
|---|---|---|
| Kenmore | 11060202990 | Dryer |
| Kenmore | 11060212990 | Dryer |
| Kenmore | 11060602990 | Dryer |
| Kenmore | 11060612990 | Dryer |
| Kenmore | 11060622990 | Dryer |
| Kenmore | 11060832990 | Dryer |
| Kenmore | 11060842990 | Dryer |
| Kenmore | 1106085299 | Dryer - Kenmore Dryer Model 110.6085299 (1106085299, 110 6085299) Parts |
| Kenmore | 11060852990 | Dryer |
| Kenmore | 11060854990 | Dryer |
| Kenmore | 11060857990 | Dryer |
| Kenmore | 11060882990 | Dryer |
| Kenmore | 11060884990 | Dryer |
| Kenmore | 11060887990 | Dryer |
| Kenmore | 1106090199 | Dryer - Kenmore Dryer Model 110.6090199 (1106090199, 110 6090199) Parts |
| Kenmore | 11060901990 | Dryer |
| Kenmore | 1106090299 | Dryer - Kenmore Dryer Model 110.6090299 (1106090299, 110 6090299) Parts |
| Kenmore | 11060902990 | Dryer |
| Kenmore | 11060904990 | Dryer |
| Kenmore | 1106090799 | Dryer - Kenmore Dryer Model 110.6090799 (1106090799, 110 6090799) Parts |
| Kenmore | 11060907990 | Dryer |
| Kenmore | 11060922990 | Dryer |
| Kenmore | 11060924990 | Dryer |
| Kenmore | 11060927990 | Dryer |
| Kenmore | 1106093299 | Dryer - Kenmore Dryer Model 110.6093299 (1106093299, 110 6093299) Parts |
| Kenmore | 11060932990 | Dryer |
| Kenmore | 1106093699 | Dryer - Kenmore Dryer Model 110.6093699 (1106093699, 110 6093699) Parts |
| Kenmore | 11060936990 | Dryer |
| Kenmore | 1106094299 | Dryer - Kenmore Dryer Model 110.6094299 (1106094299, 110 6094299) Parts |
| Kenmore | 11060942990 | Dryer - Kenmore Dryer |
Mail-In Recycling Rebate
Some of the parts we sell are eligible for mail-in rebates since we can recycle them. We will display any applicable rebates in your shopping cart. To redeem your rebate, contact Customer Service after you have received your part.


