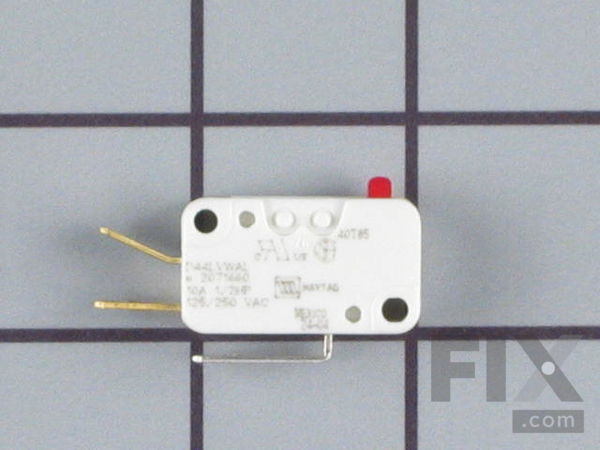
Part Location Diagram of WP207166 Whirlpool Lid Check Switch
See part 015 in the diagram
( Grid squares measure 1x1 inch )

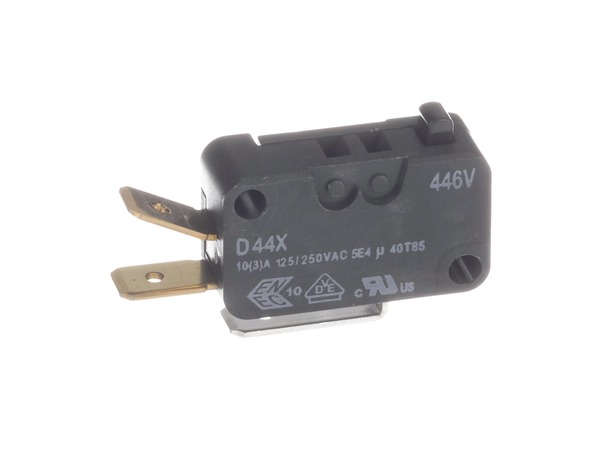
Lid Check Switch WP207166

Rated by 4 customers 

?

Really Easy 

15 - 30 mins 

Ratings submitted by customers like you who bought this part.

?
$50.62
In Stock
Fix Number:
FIX11738787
Manufacturer #:
WP207166
Manufactured by:
Whirlpool

Product Description

This is used to start your washer once the desired water level is reached.

Questions and Answers

We're sorry, but our Q&A experts are temporarily unavailable.
Please check back later if you still haven't found the answer you need.

Installation Instructions Provided by Fix customers like you.

Average Repair Rating: 4.5 / 5.0, 4 reviews.
  • 1
Sort by:
Sorry, we couldn't find any existing installation instruction that matched.
Customer:
Gary from Pickerington, OH
Parts Used:
WP207166
Difficulty Level:
Easy
Total Repair Time:
30 - 60 mins
Tools:
Screw drivers
Motor wouldn't' spin
Tested micro switch with VOM, switch was open instead of closed for motor operation. One screw held switch in position.
1 person found this instruction helpful.
Was this instruction helpful to you?
Thank you for voting!
Customer:
Shelby, from Kankakee, IL
Parts Used:
WP207166
Difficulty Level:
Really Easy
Total Repair Time:
Less than 15 mins
Tools:
Screw drivers
Washer fills with water, then stops.
Ileays unplug the appliance before attempting any repair or trouble shooting. I watched a few YouTube videos as a guide. I was able to rig the washer to work with a few clip leads until the part was delivered. First, due to the age of the washer the control panel wasn't a flip top. I just had to unscrew 4 screws to gain access. There was also a schematic inside. **Remember where the clips connected to the old part.** It took a bit of time to work the clips off on the part. The part is held on by 1 screw. Remove the screw, add new part, attach clips to new part, done. Saved $$$$! Thanks!
0 of 1 people found this instruction helpful.
Was this instruction helpful to you?
Thank you for voting!
Customer:
Otho from Old Hickory, TN
Parts Used:
WP207166
Difficulty Level:
Really Easy
Total Repair Time:
Less than 15 mins
Tools:
Screw drivers
The washer timer would fail to advance intermittently
Diagnosing the problem was the most time-consuming thing to do. In order to perform this step, I took the access panel off the control panel with the two Phillips-head screws: one on the top right and one on the top left of the chrome trim surrounding the panel. When the timer failed to advance, I probed around with a wooden dowel and tou ched various electrical components. The Lid Check Switch could be moved slightly and cause the timer to begin advancing again. So, I got the part number off of it, found the switch on the site, bought it, picked it up off my front porch and installed it. Easy to do, remove one screw through the switch body, removed old switch after photographing the wire connections, hooked the wires to the same terminals on the new switch, and put the single screw through the new switch into the threaded socket embedded in the mount. I checked the lid operating rod that contacts the micro-switch on the Lid Check Switch to make sure it contacted it enough but not too much. It was fine without adjusting it. I replaced the panel and ran a load of clothes. It works like new. This is the second repair on this vintage Maytag - 23 years old. The first was the filler tube assembly - about $32 - now this for $26 including shipping. That is a ridiculously low $2.52 per year in repairs. Love those old Maytags.
0 of 1 people found this instruction helpful.
Was this instruction helpful to you?
Thank you for voting!
Customer:
Timothy from Fort Thomas, KY
Parts Used:
WP207166
Difficulty Level:
Really Easy
Total Repair Time:
Less than 15 mins
Tools:
Nutdriver, Screw drivers
Wouldn't run.
Very easy part replacement. I wanted to post here and say how easy and precise the troubleshooting section of this site was and everything came together very easily. Great site. Thank you!
0 of 1 people found this instruction helpful.
Was this instruction helpful to you?
Thank you for voting!
  • 1

Model Compatibility

This part works with the following models:
Fix Number: FIX11738787
Manufacturer Part Number: WP207166
Brand Model Number Description
Kenmore 101963580 Washer - Kenmore Washing Machine Model 101.963580 (101963580, 101 963580) Parts
Kenmore 101963581 Washer - Kenmore Washing Machine Model 101.963581 (101963581, 101 963581) Parts
Kenmore 101963582 Washer - Kenmore Washing Machine Model 101.963582 (101963582, 101 963582) Parts
Maytag 6329 Washer - MAYTAG AUTOMATIC WASHER
Maytag 6349 Washer - MAYTAG AUTOMATIC WASHER
Maytag 6359 Washer - MAYTAG AUTOMATIC WASHER
Maytag A1910 Washer - Top Loading
Maytag A25CA Washer
Maytag A25CAE Washer
Maytag A25CM Washer
Maytag A25CME Washer
Maytag A25CS Washer
Maytag A25CT Washer
Maytag A26CA Washer
Maytag A26CAE Washer
Maytag A3910 Washer - Top Loading
Maytag A4910 Washer - Top Loading
Maytag A5000 Washer - Top Loading
Maytag A5910 Washer - Top Loading
Maytag A6910 Washer - Residential
Maytag A7300 Washer - Top Loading
Maytag A7400 Washer - Top Loading
Maytag A7500 Washer - Residential
Maytag A7500S Washer - Residential
Maytag A7500W Washer - Residential
Maytag A7800 Washer - Residential
Maytag A8100 Washer - Residential
Maytag A8120 Washer - Top Loading
Maytag A8140 Washer - Top Loading
Maytag A8200 Washer - Top Loading