Crosley Parts
Find Parts Fast
Guaranteed Fit
Repair Videos


Popular Crosley Parts
- Fix Number
- FIX11746591
- Manufacturer Part Number
- WP8565925
Fixes these symptoms
- Door latch failure
- Door won’t close
- Noisy
- See more...
Installation Instructions
Richard from Austin, TX
Wheels on original upper rack adjust fell off and end stops would not stay on.
Removed old end stops. Pulled rack out of machine. Carefully removed old adjusters. Snapped in new adjusters. Slid rack back into the runners. Clipped in the new end stops. Done.
Read more...
- Fix Number
- FIX346995
- Manufacturer Part Number
- 341241
Fixes these symptoms
- Drum Not Spinning
- Heat stays on after drum has stopped
- Noisy
- See more...
- Fix Number
- FIX373087
- Manufacturer Part Number
- 4392065
Fixes these symptoms
- Drum Not Spinning
- Heat stays on after drum has stopped
- Marks left on clothes
- See more...
Installation Instructions
Steve from South Lake Tahoe, CA
Defective heater element dryer still runs.
Expect to spend a lot of time on your knees. Unplug appliance. Remove dryer hose. remove back cover 4-6 7mm bolts. Unplug dryer heater element connections 2 blade or pin connectors. Unbolt element cover and remove old element. Label wires. Hopefully the replacement connections match if not go to hardware store. Crimp or better solder on new connectors. Install element in housing and reattach. Clean out all old dirt and lint. check old belt for wear and re-grease drum roller shafts. re-install back cover, hose and plug in. enjoy you just saved $600
Read more...
- Fix Number
- FIX11741460
- Manufacturer Part Number
- WP3392519
Fixes these symptoms
- Drum Not Spinning
- Heat stays on after drum has stopped
- Not Heating
- See more...
Installation Instructions
gary from apex, NC
dryer not heating
Checked the heating element and found a break in the heating coil. Decided to change the thermal fuse and the the cycling thermostat because of the age of the dryer.
Read more...
- Fix Number
- FIX334313
- Manufacturer Part Number
- 279838
Fixes these symptoms
- Heat stays on after drum has stopped
- Noisy
- Not Heating
- See more...
Installation Instructions
gary from apex, NC
dryer not heating
Checked the heating element and found a break in the heating coil. Decided to change the thermal fuse and the the cycling thermostat because of the age of the dryer.
Read more...
- Fix Number
- FIX373088
- Manufacturer Part Number
- 4392067
Fixes these symptoms
- Drum Not Spinning
- Marks left on clothes
- Noisy
- See more...
Installation Instructions
Duncan from Canadian, TX
Dryer sqeeking an running rough. Real noisey.
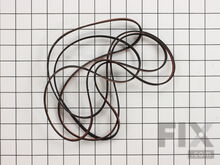
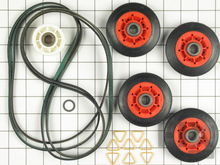
After watching the video (very helpful), I dove in and disassembled the front of the machine, lifted drum out with belt an replaced all the parts provided in the kit I had purchased. Gave the inside a good cleaning, reassembled, turned on and was very satisfied with the results (sounds an ran like brand new). The job was very easy and the wife was pleased. Your video was the most helpful. Although since it was my 1st time, it probably took a little longer than a professional would have taken but the 100+ dollars I saved was well worth the time spent. Thank you for the kit an the video.
Read more...
- Fix Number
- FIX1570070
- Manufacturer Part Number
- 12001541
Fixes these symptoms
- Drum Not Spinning
- Marks left on clothes
- Noisy
- See more...
Installation Instructions
James from Gainesville, GA
"Sqealing" noise when drum rotating
Disconnected power supply, removed front panel, removed tub support bracket, removed electrical lines from light and door switch( to have better access to install front guide kit), removed belt, removed drum, removed old rollers, installed new rollers and rest of installation was in reverse order of taking machine apart. In order to install the front guide kit(which I've never done before), I had to watch the installation instructions via you-tube. This was a tremendous aide as the instructions were simple and very adequate.
Read more...
- Fix Number
- FIX438018
- Manufacturer Part Number
- 316075103
Fixes these symptoms
- Element will not heat
- Little to no heat when baking
- Little to no heat when broiling
- See more...
Installation Instructions
Werkheiser from Saylorsburg, PA
Bake element broke
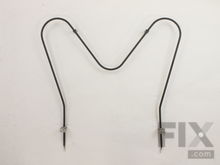
Extremely easy. I unscrewed two screws and pulled out old element and plugged in the new one. Pushed back in and screwed the screws back in. That's it
Read more...
- Fix Number
- FIX11752609
- Manufacturer Part Number
- WPW10314173
Fixes these symptoms
- Drum Not Spinning
- Marks left on clothes
- Noisy
- See more...
Installation Instructions
JAMES from GREENSBURG, PA
Loud squeaking and squealing
Lint Filter - Removed old lint filter and inserted new lint filter. This is the first time I tried to fix a dryer. A handyman I am not. I found two very useful YouTube videos using basically my model of Kenmore (11067851600). Disassembly/Assembly - here is a difference between Kenmore 29" wide dryers and 27" wide dryers. Mine is 27". My effort was not a smooth as these videos. The bottom front panel's right most clip was quite troublesome. The moisture sensor wire required needle nose pliers to be disconnected and reconnected. The open door sensor was not easy to disconnect. Although with a few special magic words it came apart. The upper front panel was held in place with two T20 Torx screws. I had only had a T15 driver, therefore a trip to Home Depot was required. The first two tri rings were not easily removed, however, on third tri ring it became easier and not damaged. Replacement of tri rings was not troublesome. Support rollers snapped in place easily. However, I did thoroughly clean the housing. It was quite grimy. Actually, while I had the dryer open I cleaned everything including the heating element and electric motor. It now operates quietly. It took me a little over two hours because I am not handy and must take care not to make matters worse plus I thoroughly cleaned everything include scuff marks where the drum rubs. Anyone else probably should have it completed 30-60 minutes easily.
Read more...
- Fix Number
- FIX12585623
- Manufacturer Part Number
- 5304517203
Fixes these symptoms
- Door latch failure
- Leaking
- Noisy
- See more...
Installation Instructions
Leesa from Clarksburg, WV
Took lower stray arm off because of draining issues, put back together and arm melted after starting.
The reviews before mine helped A LOT!! First of all, It has everything to do with making sure that when the arm is installed that it is turned until it clicks/locks in. This is why my arm melted when I put it back together the first time. I read the reviews before I purchased and that was really the only way I knew how to repair the piece. It does not come with instructions.
Read more...
Crosley Appliance Types
- Crosley Cooktop Parts
- Crosley Dishwasher Parts
- Crosley Dryer Parts
- Crosley Freezer Parts
- Crosley Microwave Parts
- Crosley Range Parts
- Crosley Refrigerator Parts
- Crosley Wall Oven Parts
- Crosley Washer Parts
- Crosley Washer Dryer Combo Parts
- Crosley Air Conditioner Parts
- Crosley Dehumidifier Parts
- Crosley Ice Maker Parts
Popular Crosley Models
- WWSS2601KW0
- CDE6000W Residential
- WWSS2601KW1
- WRT8G3EWN
- CED126SXQ1 29" ELECTRIC DRYER
- CDE6500W Residential
- VED6505GW0 RESIDENTIAL
- WWTR1802KW7
- CW6000W Residential
- WRT8G3EWE
- CRTE183AWM Top Freezer
- CEDX631VQ1 Residential
- CED137SXQ0 29" ELECTRIC DRYER
- CEDS832VQ1
- WWSS2601KW6
- C31113WAV Freestanding, Gas, Electric
- CDG6000W Residential
- CFW4700LW0
- CAW9244BW0 AUTOMATIC WASHER
- CRTE184JW2


