


How to Fix the Drive Motor for a Dryer That Will Not Start
If your dryer won’t start or isn’t turning on, there’s a chance that those problems may be caused by its motor. The motor is like the main engine of the dryer, and when it’s bad or damaged, it can cause the entire dryer not to work properly, or perhaps even to start, especially since it’s one of the core components of your dryer and is connected to many different other components in the dryer. There are a couple of things that might be broken in a malfunctioning motor, namely a broken bearing or winding, but it could be something even more problematic. Luckily, our guide below is here to help you not only figure out whether the motor is the part causing your dryer issues, but also to assist you with the entire motor replacement process if your motor is the problem!
What is a Drive Motor?
The motor is the main engine within your dryer, and it works with the other components, like the pulleys and belt, to rotate the inner-tub so that your clothes can be evenly dried. If the motor has failed, it’ll cause the dryer not to rotate properly, or perhaps not to rotate at all – and in either case, it will need to be replaced. A failed motor can also present a safety hazard since the heating element will likely still be functioning and can cause extreme heat to build up, potentially causing other parts to fail within your dryer.
Where is the Drive Motor Located?
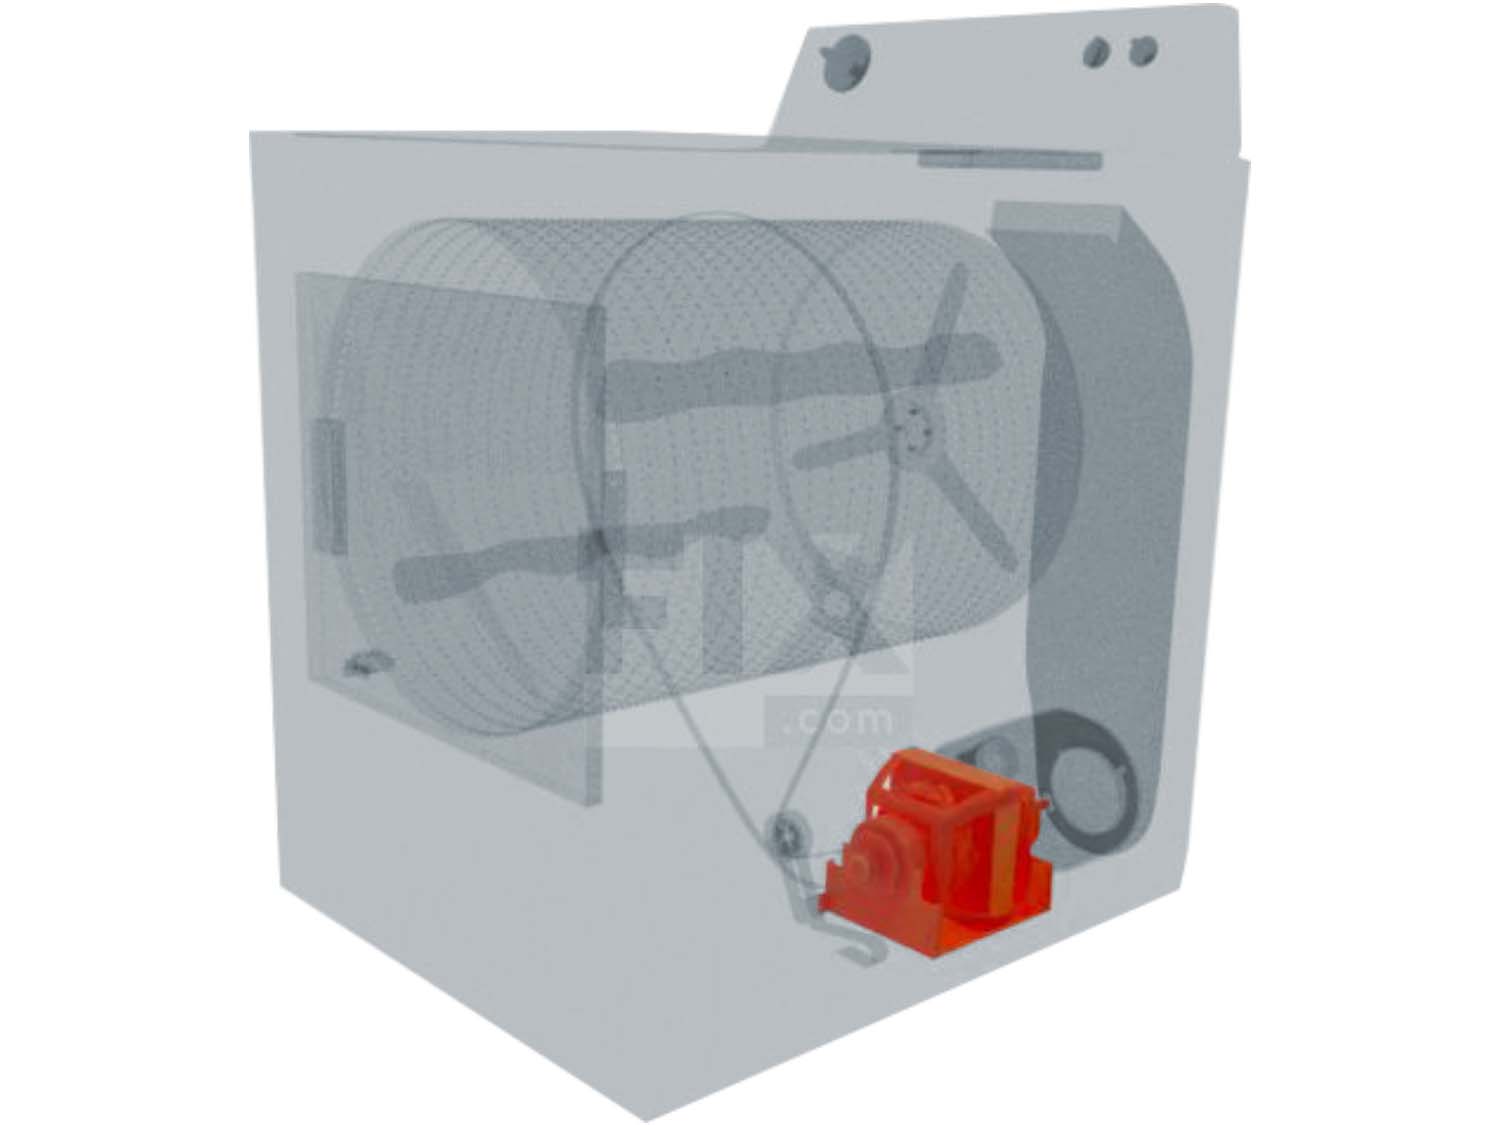
The location of a dryer’s motor can vary from model to model, but it’s generally in the bottom of the appliance cabinet, underneath or behind the inner-tub. For further assistance finding your dryer’s motor, refer to the 3D diagram below.
General Location of the Drive Motor in a Dryer
How to Access, Remove, and Inspect the Drive Motor in a Dryer
- Depending on the model of your dryer, you may have to remove the lint filter from your dryer first to be able to lift the top panel of your dryer.
- Using the corresponding socket-set or screwdriver, remove or lift the top panel (depending on your model, you may also have to remove the front or back panel, or in some cases, even both) to gain access to the inside of the dryer.
- Once you’ve located the motor within your dryer, locate and identify the screws or fastenings keeping the motor in place.
- To test the motor, you will need to use a wiring diagram in order to figure out which wires to test. This can be done without having to remove the motor to check its continuity to make sure it’s able to convert an electrical signal. This test is done using a multimeter, and if you’re not comfortable with this step, we recommend contacting a technician.
- If testing the motor confirms it is bad, you will want to remove and replace it. First, remove the blower, which is typically attached to the motor near the end – making sure to check the threading on the fastening nut and bolt, since some manufacturers use left-hand thread.
- Release the tension off the pulleys with the drive belt, removing it from the motor as well.
- Remove your dryer's drum, together with the belt.
- Then, you can remove the motor.

How to Test a Drive Motor
- Using the appropriate wiring diagram for your model’s motor, touch one probe of your multimeter to one terminal on the motor, and the other probe to the other terminal.
- If there is no audible or visual indication of continuity, the motor has likely failed and needs to be replaced.
- You may also want to check the bearing on the motor by rotating it. If there’s a large amount of resistance, the bearing may have also failed.
- In that case, the bearing will need to be replaced too.

How to Install a New Drive Motor
- Place and secure the new motor within the dryer.
- Reinstall the drum.
- Reconnect the belt around the motor and pulleys, and reconnect the blower.
- Reconnect the rear or front panel to the dryer.
- Secure the top panel of your dryer and reinsert the lint filter if it was removed, and your repair is now complete!

Next: Troubleshooting the Door Switch
Go To Main Page: Will Not Start