Jump to:
Product Description
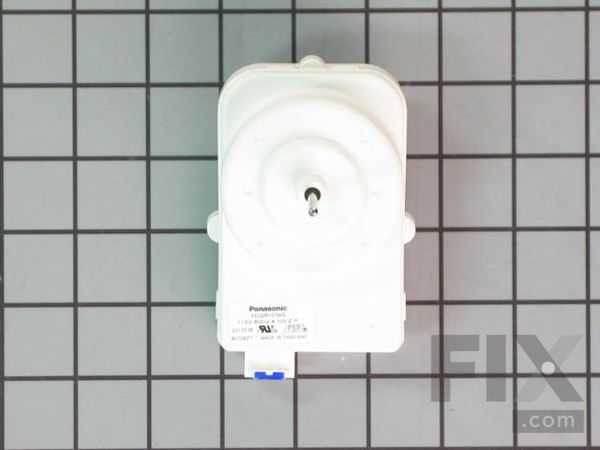
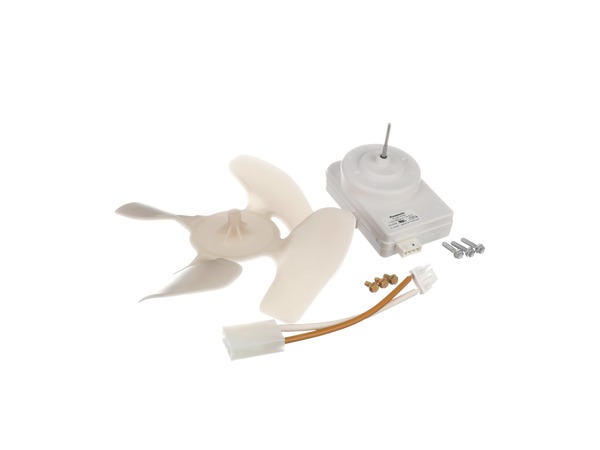
This condenser fan motor kit is used in icemakers and freezers, the purpose is to circulate air through the condenser in the compressor area in order to keep it cool. If your fridge is making loud noises when running or it is getting too warm, then consider replacing this part to solve your problem. The tools needed for this repair: 1/4 inch nut driver, slip joint pliers, 1/4 inch drive ratchet, and small flat blade screw driver. For installation instructions, follow manual provided by the manufacturer. Unplug tool from power source before you begin installation process.
-
Works with the following brands:Whirlpool, Kenmore, KitchenAid, Maytag
-
Works with the following products:Refrigerator, Ice Maker, Freezer
-
Fixes the following symptoms:Noisy, Fridge too warm, Freezer section too warm, Fridge and Freezer are too warm
-
Part# W10124096 replaces these:AP4318657, 1378525, W10124096, 2188538, 2188727, 2188728 ... Show more , 2188729, 2188732, 2188891, 2206005, 2315538, 2315558, W10124096, W10124096VP, W10130108, W10204250, W10509333, W10861645 Show less
- Works with the following brands:
- Whirlpool, Kenmore, KitchenAid, Maytag
- Works with the following products
- Refrigerator, Ice Maker, Freezer
- Fixes the following symptoms
- Noisy, Fridge too warm, Freezer section too warm, Fridge and Freezer are too warm
- Part# W10124096 replaces these:
- AP4318657, 1378525, W10124096, 2188538, 2188727, 2188728, 2188729, 2188732, 2188891, 2206005, 2315538, 2315558, W10124096, W10124096VP, W10130108, W10204250, W10509333, W10861645
Videos For installing this part.
Replacing your Refrigerator Condenser Fan Motor Kit

Questions and Answers
Be the first to ask our experts a question about this part!
Related Parts Additional or alternate parts to consider.
Installation Instructions Provided by Fix customers like you.
- < Prev
- 1
- Next >
- Customer:
- Patricia from Moline, IL
- Parts Used:
- W10124096
- Difficulty Level:
- Easy
- Total Repair Time:
- 30 - 60 mins
- Tools:
- Screw drivers, Socket set
- Customer:
- Mark from CANTERBURY, CT
- Parts Used:
- W10124096
- Difficulty Level:
- Easy
- Total Repair Time:
- 30 - 60 mins
- Tools:
- Nutdriver, Pliers, Socket set
Once parts arrived (about a week later, New fan blades and motor), pulled refrig back out unplugged electric cord, used 1/4" socket, removed old fan and bracket (4 screws) unplugged wire harness, removed fan/bracket assembly from under refrig, then removed (3) -1/4" screws holding motor to bracket, installed new motor to bracket, using same screws(fan came with new screws if needed) new motor came with a short wiring harness, one side fits new fan, other end supposed to fit original electric plug on refrig, but would not slip together, I had to remove center lug of new wire harness plug(no wire in center lug) scored with utility knife snapped center lug off, harness plugs slipped together, and clicked locking together, re-installed fan to bracket, slid fan blade onto motor shaft, re-installed fan/bracket assembly into original position , making sure wire and other tubes were back in original spaces, plugged in refrig cord,,new fan was on/spinning, used compressed air to blow out dust from under refrig(can be very dusty under there should be cleaned about every 6 months), re-installed cardboard lower panel and refig has worked great since, door edges and gaskets are now cool like normal !,,, Mark
- Customer:
- Roger from SAN JOSE, CA
- Parts Used:
- W10124096
- Difficulty Level:
- Very Easy
- Total Repair Time:
- 30 - 60 mins
- Tools:
- Nutdriver
- Customer:
- Gregory from Houston, TX
- Parts Used:
- W10124096
- Difficulty Level:
- Really Easy
- Total Repair Time:
- Less than 15 mins
- Tools:
- Screw drivers, Socket set
- Customer:
- Chuck from Camp Sherman, OR
- Parts Used:
- W10124096
- Difficulty Level:
- Easy
- Total Repair Time:
- 15 - 30 mins
- Tools:
- Nutdriver
- Customer:
- Anthony J. from Medford,, NY
- Parts Used:
- W10124096
- Difficulty Level:
- Really Easy
- Total Repair Time:
- 30 - 60 mins
- Tools:
- Wrench set
- Customer:
- calvin from Rockingham, NC
- Parts Used:
- W10124096
- Difficulty Level:
- Really Easy
- Total Repair Time:
- 15 - 30 mins
- Tools:
- Socket set
- < Prev
- 1
- Next >
- < Prev
- 1
- Next >
Model Compatibility
Manufacturer Part Number: W10124096
| Brand | Model Number | Description |
|---|---|---|
| Kenmore | 10640212010 | Refrigerator |
| Kenmore | 10641522500 | Refrigerator |
| Kenmore | 10641523500 | Refrigerator |
| Kenmore | 10641524500 | Refrigerator |
| Kenmore | 10641529500 | Refrigerator |
| Kenmore | 10642102300 | Freezer |
| Kenmore | 10642102301 | Freezer |
| Kenmore | 10642104300 | Freezer |
| Kenmore | 10642106300 | Freezer |
| Kenmore | 10642106301 | Freezer |
| Kenmore | 10644022600 | Refrigerator |
| Kenmore | 10644022601 | Refrigerator |
| Kenmore | 10644022602 | Refrigerator |
| Kenmore | 10644022603 | Refrigerator |
| Kenmore | 10644023600 | Refrigerator |
| Kenmore | 10644023601 | Refrigerator |
| Kenmore | 10644023602 | Refrigerator |
| Kenmore | 10644023603 | Refrigerator |
| Kenmore | 10644024600 | Refrigerator |
| Kenmore | 10644029600 | Refrigerator |
| Kenmore | 10644029601 | Refrigerator |
| Kenmore | 10644029602 | Refrigerator |
| Kenmore | 10644029603 | Refrigerator |
| Kenmore | 10644032600 | Refrigerator |
| Kenmore | 10644032601 | Refrigerator |
| Kenmore | 10644032602 | Refrigerator |
| Kenmore | 10644032603 | Refrigerator |
| Kenmore | 10644033600 | Refrigerator |
| Kenmore | 10644033601 | Refrigerator |
| Kenmore | 10644033602 | Refrigerator |
Some of the parts we sell are eligible for mail-in rebates since we can recycle them. We will display any applicable rebates in your shopping cart. To redeem your rebate, contact Customer Service after you have received your part.


