( Grid squares measure 1x1 inch )

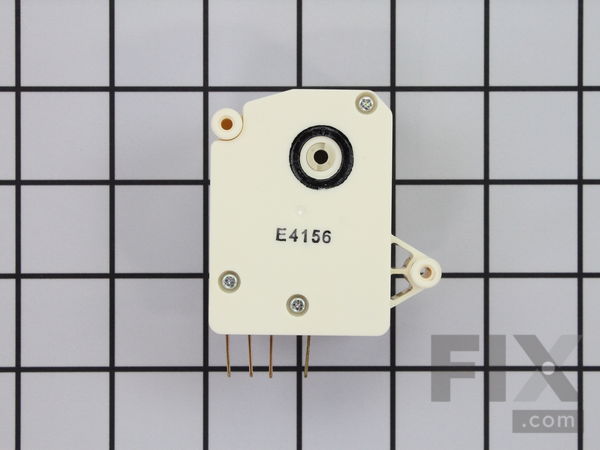
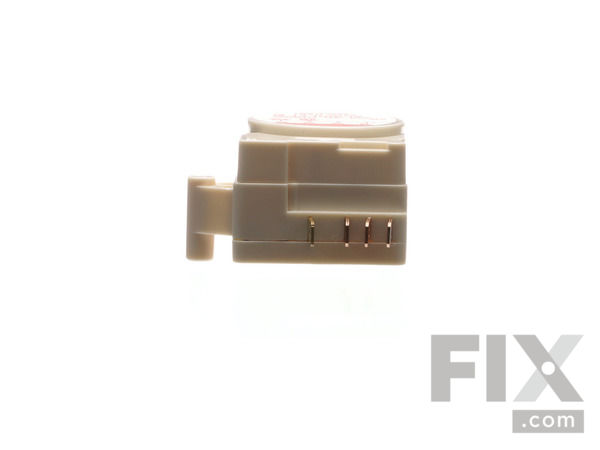
Refrigerator Defrost Timer WR9X489

Works With Model 36350227000!

Rated by 7 customers 

?

Easy 

15 - 30 mins 

Ratings submitted by customers like you who bought this part.

?
$50.53
In Stock
Fix Number:
FIX310858
Manufacturer #:
WR9X489
Manufactured by:
GE
Works With Model 36350227000!

Product Description

This device acts like a clock. It continually advances and alternates between activating the cooling cycle and the defrost heater.

Videos For installing this part.

Replacing your Refrigerator Defrost Timer

Replacing your Refrigerator Defrost Timer

Questions and Answers

We're sorry, but our Q&A experts are temporarily unavailable.
Please check back later if you still haven't found the answer you need.

Installation Instructions Provided by Fix customers like you.

Average Repair Rating: 3.9 / 5.0, 7 reviews.
  • 1
Sort by:
Sorry, we couldn't find any existing installation instruction that matched.
Customer:
Paul from York, PA
Parts Used:
WR9X489, WR51X442
Difficulty Level:
Easy
Total Repair Time:
30 - 60 mins
Tools:
Nutdriver, Socket set
Major defrost issue
With the refrigerator unplugged, remove food, any racks in freezer and cover plates for coils and defrost timer (in fridge side). Defrost timer is simple: remove housing from rear wall, unplug timer and remove mounting screws. Install new timer (set timer so it is out of defrost mode -listen to the clicks or watch the video for assistan ce) and reverse process. Defrost heater is simple but may require more time. Use of hair dryer / heat gun may be needed to remove frost on coils. Each heater had two screws to hold to the coil frame and one shared electrical connector to attach to the main harness. Heater wires are positioned behind pinch points and behind the coils, so use of a reaching tool may help. Once the heater and accompanying thermostat (clips onto top coil) are removed install the new unit. Be sure to NOT touch the glass tube for the heater and position all wires properly. Reinstall all cover plates, racks, food and plug in, then wait 24hours for the refrigerator to do its job.
3 of 3 people found this instruction helpful.
Was this instruction helpful to you?
Thank you for voting!
Customer:
David from Albuquerque, NM
Parts Used:
WR9X489, WR60X10030, WR51X10055, WR50X122
Difficulty Level:
Easy
Total Repair Time:
30 - 60 mins
Tools:
Nutdriver, Screw drivers
frig side warm, freezer ok
Watched the videos then found a schematic which showed the defroster, temp sensor and timer all in series. Checked continuity of defroster per the video ( open) so decided to change all to make sure. Ordered the parts for overnight delivery. Arrived the next morning. When finished with replacement I plugged in the cord and...nothing!!! Lights worked but nothing else. Had to rotate the exposed timer screw then the evaporator fan started to run again...turned out the timer was in the defrost cycle! Took a full 24 hours to get really cold on the frig side.
2 of 2 people found this instruction helpful.
Was this instruction helpful to you?
Thank you for voting!
Customer:
Timothy from Blanchard, MI
Parts Used:
WR9X489
Difficulty Level:
Really Easy
Total Repair Time:
Less than 15 mins
Tools:
Nutdriver, Screw drivers
Refrigerator food compartment was staying warm,
I first watched the video provided by this site. Then I removed the back cover panel from the frozen food section, and sure enough the upper coil was frozen solid. The other two coils were not, there are three altogether. So I ruled out that the heaters were faulty. Removing the frozen food rear panel took about 3 minutes, very easy to do . Then I went to the fresh food compartment removed the rear plastic cover where the light bulb and the defrost timer are located. Three minutes to remove and equal time to replace. Been three weeks now, refrigerator runs like it is brand new. I think I missed my calling with the help of this site
2 of 2 people found this instruction helpful.
Was this instruction helpful to you?
Thank you for voting!
Customer:
Tom from MANSFIELD, OH
Parts Used:
WR9X489, WR55X24064
Difficulty Level:
Easy
Total Repair Time:
30 - 60 mins
Tools:
Nutdriver, Screw drivers
Neither the freezer or refridgerator keeping temperature
First I found the closest model number to our unit. After it brought up the parts and possible problems I started checking out what mine was doing. The freezer was all frozen at the back which meant the defrost timer was not kicking on the defrost cycle and letting the coils freeze up and not letting anything work properly. I changed t he defrost timer and manually melted the ice off the coils and everything started working great. I did buy a run capacitor to help the compressor kick on just in case it needed it. I spent $65.00 on the whole repair. I recommend watching the video's on this site. I was very happy with this site as they saved me a bunch as we were going to start looking for a new refridgerator but now we don't need to. Tom...........
1 person found this instruction helpful.
Was this instruction helpful to you?
Thank you for voting!
Customer:
James from Ayden, NC
Parts Used:
WR9X489
Difficulty Level:
Easy
Total Repair Time:
15 - 30 mins
Tools:
Nutdriver
Fridge side warm, Freezer not Freezing
After reading the problems and having Ice build up in the freezer. I replaced the timer and a twenty year old side by side is working great.
0 of 1 people found this instruction helpful.
Was this instruction helpful to you?
Thank you for voting!
Customer:
Dennis from DeWitt, VA
Parts Used:
WR9X489, WR50X122
Difficulty Level:
Really Easy
Total Repair Time:
15 - 30 mins
Tools:
Screw drivers
Refrigerator and freezer were not cooling.
Repair was simple. I wish every appliance I have was this easy to repair. GE has Whirlpool beat hands down!Just watch the video supplied online it is as simple as that.
0 of 1 people found this instruction helpful.
Was this instruction helpful to you?
Thank you for voting!
Customer:
Andrew from Mesquite, NV
Parts Used:
WR9X489
Difficulty Level:
Really Easy
Total Repair Time:
Less than 15 mins
Tools:
Nutdriver
Freezer section warmed to 40 degrees periodically, determined that the defrost timer was sticking
In refrigerator section, move refrigerator and freezer temperature sliders to "off" and #1 position respectively. Carefully slide plastic facia plate from it's clip, then slide temperature facia plate from it's clips. Remove nut screw from pivoting cover next to light bulb, remove nut screw from defrost timer. Remove old timer, replace wi th new, reverse processes. DO NOT FORGET to set new timer as per installation video before installing. This is a one expletive job, , that was easy!
0 of 1 people found this instruction helpful.
Was this instruction helpful to you?
Thank you for voting!
  • 1

Model Compatibility

This part works with the following models:
Fix Number: FIX310858
Manufacturer Part Number: WR9X489
Brand Model Number Description
Kenmore 36348042893 Refrigerator
Kenmore 36348042894 Refrigerator
Kenmore 36348042896 Refrigerator
Kenmore 36348042897 Refrigerator
Kenmore 36348047893 Refrigerator
Kenmore 36348047894 Refrigerator
Kenmore 36348047896 Refrigerator
Kenmore 36348047897 Refrigerator
Kenmore 36348252893 Refrigerator
Kenmore 36348252894 Refrigerator
Kenmore 36348252896 Refrigerator
Kenmore 36348252897 Refrigerator
Kenmore 36348257893 Refrigerator
Kenmore 36348257894 Refrigerator
Kenmore 36348257896 Refrigerator
Kenmore 36348257897 Refrigerator
Kenmore 36350221000 Refrigerator
Kenmore 36350222000 Refrigerator
Kenmore 36350227000 Refrigerator
Kenmore 36350232000 Refrigerator
Kenmore 36350237000 Refrigerator
Kenmore 36350242000 Refrigerator
Kenmore 36350247000 Refrigerator
Kenmore 36350622000 Refrigerator
Kenmore 36350627000 Refrigerator
Kenmore 36358042893 Refrigerator
Kenmore 36358042894 Refrigerator
Kenmore 36358042896 Refrigerator
Kenmore 36358042897 Refrigerator
Kenmore 36358047893 Refrigerator