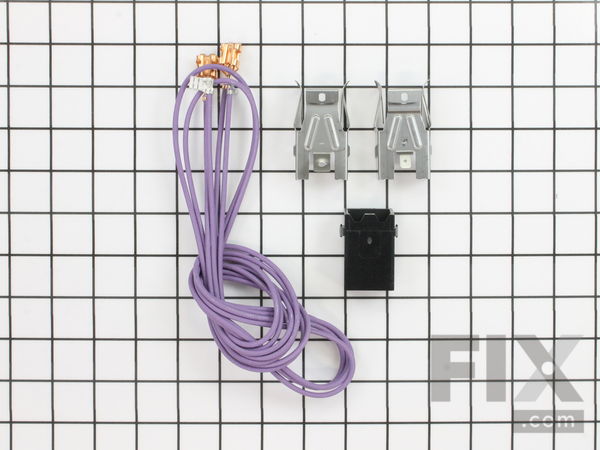
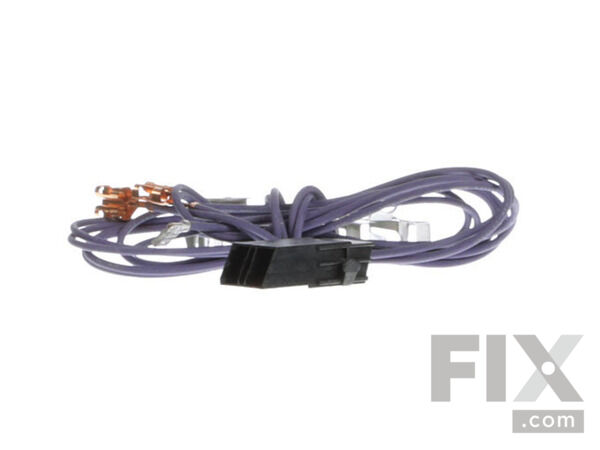
Range Surface Burner Terminal Block Kit WB17T10006
- Fix Number:
- FIX783534
- Manufacturer #:
- WB17T10006
- Manufactured by:
- GE
Jump to:
Product Description
The terminal block is the socket for the coiled burner elements of your cooktop or range in order for the burners to heat up. If your element is not heating up or turning on, there may be an issue with the terminal block. If you remove the coiled element and there are signs of corrosion or arcing on the prongs, the terminal block will need to be replaced. To replace the terminal block, you will need access to the sides and back of the range, so you will need to pull the appliance fully out from the wall. Please be sure to disconnect the power supply to your range before beginning this repair, as you will be cutting, removing, and connecting wiring. This is a genuine OEM replacement kit, and it includes the wires with female contacts, the terminal block, and mounting clip.
-
Works with the following brands:General Electric, Kenmore, Hotpoint
-
Works with the following products:Range
-
Fixes the following symptoms:Element will not heat, Will Not Start
-
Part# WB17T10006 replaces these:AP3203326, 1038747, WB17T10006, WB17K10003, WB17T10001, WB17X10007
- Works with the following brands:
- General Electric, Kenmore, Hotpoint
- Works with the following products
- Range
- Fixes the following symptoms
- Element will not heat, Will Not Start
- Part# WB17T10006 replaces these:
- AP3203326, 1038747, WB17T10006, WB17K10003, WB17T10001, WB17X10007
Videos For installing this part.
Replacing your Range Surface Burner Terminal Block Kit

Questions and Answers
Be the first to ask our experts a question about this part!
Related Parts Additional or alternate parts to consider.
Installation Instructions Provided by Fix customers like you.
- < Prev
- 1
- Next >
- Customer:
- Charles from Marathon, TX
- Parts Used:
- WE4M325, WB17T10006
- Difficulty Level:
- A Bit Difficult
- Total Repair Time:
- 30 - 60 mins
- Tools:
- Nutdriver, Pliers, Screw drivers
- Customer:
- Patrick from Spring Mills,, PA
- Parts Used:
- WB30K10018, WB17T10006
- Difficulty Level:
- Very Easy
- Total Repair Time:
- 15 - 30 mins
- Tools:
- Pliers, Socket set
- Customer:
- Rajni from Dunedin, FL
- Parts Used:
- WB17T10006
- Difficulty Level:
- Really Easy
- Total Repair Time:
- Less than 15 mins
- Tools:
- Nutdriver, Screw drivers
- Customer:
- Sue from Wooster, OH
- Parts Used:
- WB17T10006
- Difficulty Level:
- Really Easy
- Total Repair Time:
- 15 - 30 mins
- Tools:
- Socket set
- Customer:
- Madeline from Wainwright, AK
- Parts Used:
- WB17T10009, WB17T10006
- Difficulty Level:
- Easy
- Total Repair Time:
- 15 - 30 mins
- Tools:
- Screw drivers, Wrench (Adjustable)
- Customer:
- Robbin from Bow, NH
- Parts Used:
- WB17T10006
- Difficulty Level:
- A Bit Difficult
- Total Repair Time:
- 15 - 30 mins
- Tools:
- Nutdriver, Pliers
- Customer:
- FRANCIS from MURRELLS INLET, SC
- Parts Used:
- WB17T10006
- Difficulty Level:
- Easy
- Total Repair Time:
- 30 - 60 mins
- Tools:
- Pliers, Screw drivers
- Customer:
- Robert from Mansfield, TX
- Parts Used:
- WB24X10130, WB17T10006, WB24T10025, WB1X500D
- Difficulty Level:
- Really Easy
- Total Repair Time:
- 30 - 60 mins
- Tools:
- Nutdriver, Pliers
- Customer:
- THOMAS from HAGERSTOWN, MD
- Parts Used:
- WB17T10006
- Difficulty Level:
- Really Easy
- Total Repair Time:
- Less than 15 mins
- Tools:
- Wrench set
- < Prev
- 1
- Next >
Model Compatibility
Manufacturer Part Number: WB17T10006
| Brand | Model Number | Description |
|---|---|---|
| General Electric | 15451-0 | Range |
| General Electric | 154510 | Range |
| General Electric | 155910 | Range |
| Kenmore | 36261101000 | Range |
| Kenmore | 36261101001 | Range |
| Kenmore | 36261108000 | Range |
| Kenmore | 36261108001 | Range |
| Kenmore | 36261741000 | Range |
| Kenmore | 36261741001 | Range |
| Kenmore | 36261742000 | Range |
| Kenmore | 36261742001 | Range |
| Kenmore | 36261748000 | Range |
| Kenmore | 36261748001 | Range |
| Kenmore | 36262492000 | Range |
| Kenmore | 36262492001 | Range |
| Kenmore | 36262780100 | Range |
| Kenmore | 36262780101 | Range |
| Kenmore | 36262780102 | Range |
| Kenmore | 36262780103 | Range |
| Kenmore | 36262781000 | Range |
| Kenmore | 36262781001 | Range |
| Kenmore | 36262781002 | Range |
| Kenmore | 36262781003 | Range |
| Kenmore | 36262781004 | Range |
| Kenmore | 36262788000 | Range |
| Kenmore | 36262788001 | Range |
| Kenmore | 36262788002 | Range |
| Kenmore | 36262788003 | Range |
| Kenmore | 36291112000 | Range |
| Kenmore | 36291112001 | Range |
Some of the parts we sell are eligible for mail-in rebates since we can recycle them. We will display any applicable rebates in your shopping cart. To redeem your rebate, contact Customer Service after you have received your part.


