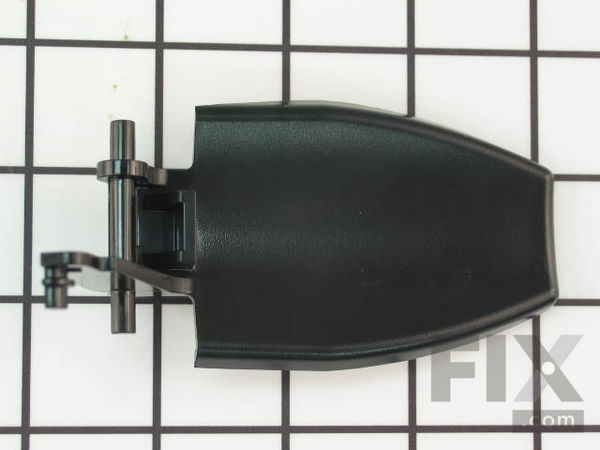
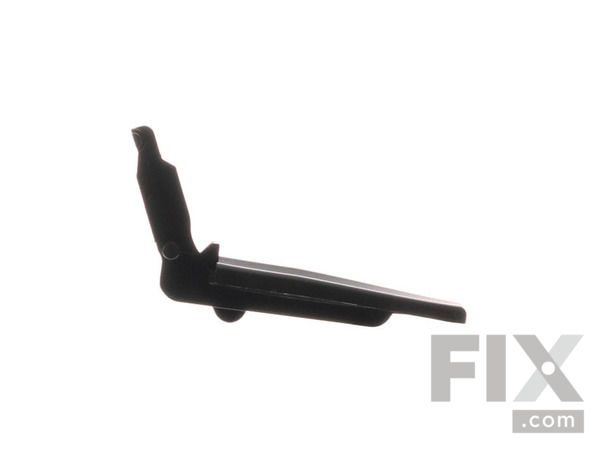
Water Dispenser Actuator 241682003
Works With Model CRSH232PB9A!
$53.70
In Stock
- Fix Number:
- FIX1526383
- Manufacturer #:
- 241682003
- Manufactured by:
- Frigidaire
Works With Model CRSH232PB9A!
Jump to:
Product Description
Once a glass is pressed against the actuator pad it will cause the dispenser to deliver ice or water when activated.
-
Works with the following brands:Frigidaire, Crosley, Westinghouse, Kenmore
-
Works with the following products:Refrigerator
-
Fixes the following symptoms:Not dispensing water, Leaking
-
Part# 241682003 replaces these:AP3965193, 1196652, 241682003, 5304422026
- Works with the following brands:
- Frigidaire, Crosley, Westinghouse, Kenmore
- Works with the following products
- Refrigerator
- Fixes the following symptoms
- Not dispensing water, Leaking
- Part# 241682003 replaces these:
- AP3965193, 1196652, 241682003, 5304422026
Part Number Cross Reference
Videos For installing this part.
Replacing your Water Dispenser Actuator

Questions and Answers
Be the first to ask our experts a question about this part!
Ask a Question
Ask our experts a question on this part and we'll respond as soon as we can.
Sorry, we couldn't find a match for "".
Here's a guide for finding your model number.
Something went wrong. Please try again later.
Your Question Has Been Submitted!
Our experts will send you an email as soon as your question has been answered.
Related Parts Additional or alternate parts to consider.
Installation Instructions Provided by Fix customers like you.
- < Prev
- 1
- Next >
Sort by:
Search filter:
Clear Filter
Your search term must have 3 or more characters.
Keep searches simple. Use keywords, e.g. "leaking", "pump", "broken" or "fit".
Sorry, we couldn't find any existing installation instruction that matched.
- Customer:
- Patricia from HAMPSTEAD, NC
- Parts Used:
- 241682003
- Difficulty Level:
- A Bit Difficult
- Total Repair Time:
- 1- 2 hours
- Tools:
- Pliers, Screw drivers
Water actuator (paddle) broke completely off.
Step 1. Unplug appliance
Step2. Remove freezer door handle. Ours is a 2 piece handle that I had to push downward on the bottom half to remove it, then remove screw holding top half of handle. Push upward on handle to remove too half.
Step 3. Remove drip pan from ice / water dispensing area
Step 4. Remove the 3 screws that ... Read more were behind the drip pan
Step 5. Push upward to remove the face plate then disconnect the wiring harness attached to the face plate (about midway of the face plate)
Step 6. Remove the screws holding the mother board, disconnect wiring harness attached to mother board. Pull the dispenser section out to reveal the water line.
Step 7. Gently pull on white water line to remove it from the water dispenser. Remove the dispenser and place on flat surface.
Step 8. Notice how the springs are holding the old actuator in place before removing screws holding the old actuator in place .
Step 8. Replace broken actuator with new one using screws.
Step 9. Return the dispensing unit, leaving enough room to grasp the white water line and push it into the dispensing hole. This is very difficult, but do-able. I used long hemostats to reach in, grab the line and force the water line into the hole. Reconnect the wiring harness on side of dispensing unit and secure unit with screws.
Step 10. Reconnect face plate with screws, replace drip tray. Reattach handles.
Read less
1 of 2 people
found this instruction helpful.
Was this instruction helpful to you?
Thank you for voting!
- Customer:
- John from Abingdon, VA
- Parts Used:
- 241682003
- Difficulty Level:
- Easy
- Total Repair Time:
- 15 - 30 mins
- Tools:
- Pliers, Screw drivers
Actuator broke
As in video except feeding water tube back into the actuator with needle nose pliers was difficult. To complete the job I inserted a short tap (could have used a wood screw) into the tube, fed it thru the opening and pulled it from the bottom with pliers.
0 of 1 people
found this instruction helpful.
Was this instruction helpful to you?
Thank you for voting!
- Customer:
- Bruce from Marietta, GA
- Parts Used:
- 241682003
- Difficulty Level:
- Really Easy
- Total Repair Time:
- 15 - 30 mins
- Tools:
- Pliers, Screw drivers
Electrical Disconnect from Water Dispenser Escutcheon
My model was somewhat different than shown on the repair video. Initially it looked like my wiring was not removable from the escutcheon. Looking closer, I found a very small black connector attached to the back face of the escutcheon that could be carefully removed with just my fingers. This really helped to be able to disconnect and
... Read more
lay the part aside while doing the rest of the work. Having the video attached to the shipping confirmation email was very convenient. It saved having to locate it myself when the part arrived.
Read less
0 of 1 people
found this instruction helpful.
Was this instruction helpful to you?
Thank you for voting!
- Customer:
- Maria from Peoria, AZ
- Parts Used:
- 241682003
- Difficulty Level:
- Easy
- Total Repair Time:
- 30 - 60 mins
- Tools:
- Pliers, Screw drivers
broken water dispenser actuator
I watched the video offered on how to replace my broken water dispenser actuator so when the part arrived a couple days later I felt very confident that I could handle the repair myself!! I followed the video's directions to the letter and it was as easy as I expected until it was time to get the small water hose back into place...it had
... Read more
to go back into a small spout at the front of the plastic frame. I tried several times to get it back in place with no luck but then I had a brain storm!!! I tied a long piece of dental floss to the small hose, threaded the floss through the small opening in the frame, put a small amount of Vaseline on the end of the water hose, put the frame work back in place and pulled on the dental floss until I saw that the water hose was back in place. I then put the rest of it back together by reversing the steps for taking it apart!! When my son heard what I had done with the dental floss, he started calling me "Momguyver"
Read less
0 of 1 people
found this instruction helpful.
Was this instruction helpful to you?
Thank you for voting!
- Customer:
- John from El Paso, TX
- Parts Used:
- 241682003
- Difficulty Level:
- A Bit Difficult
- Total Repair Time:
- 15 - 30 mins
- Tools:
- Pliers
very little room to feed tube thru dispenser
we looped a rubber band thru the hole from the bottom and pulled the tube end thru ....the rest of the online instructions were very plain and simple
0 of 1 people
found this instruction helpful.
Was this instruction helpful to you?
Thank you for voting!
- Customer:
- Barbara from Falmouth, ME
- Parts Used:
- 241682003
- Difficulty Level:
- Very Difficult
- Total Repair Time:
- More than 2 hours
- Tools:
- Screw drivers
3 screws were corroded and wouldn't unscrew
l. Slid out plastic tray which covered 3 screws 2. Tried phillips screw driver to remove 3 screws but they wouldn't move, tried to get them loose with WD40, Silicon Spray Lubricant, and finally PB Penetrating Blaster but non of those helped 3. Helper tried a drill attachment to unscrew the screws but that was unsuccessful 4. I
... Read more
have now given up.
Read less
0 of 1 people
found this instruction helpful.
Was this instruction helpful to you?
Thank you for voting!
Broken water actuator broken rt and left meat draw rails
Easily removed the glass tray and the side rails and installed the new parts the put my drawer back and fixed the water actuator. by removing the cover over it and the framed part that holds the actuator lever. by removing one screw the and the old actuator I installed the new one replaced the frame and it was done.I want to say I ordere
... Read more
d the parts on Saturday and they were at my door on Tuesday.
Read less
0 of 1 people
found this instruction helpful.
Was this instruction helpful to you?
Thank you for voting!
- < Prev
- 1
- Next >
Model Compatibility
This part works with the following models:
Fix Number: FIX1526383
Manufacturer Part Number: 241682003
Manufacturer Part Number: 241682003
| Brand | Model Number | Description |
|---|---|---|
| Kenmore | 25354703400 | Refrigerator |
| Kenmore | 25354703401 | Refrigerator |
| Kenmore | 25354703402 | Refrigerator |
| Kenmore | 25354703403 | Refrigerator |
| Kenmore | 25354703404 | Refrigerator |
| Kenmore | 25354703405 | Refrigerator |
| Kenmore | 25354703406 | Refrigerator |
| Kenmore | 25354703407 | Refrigerator |
| Kenmore | 25354703408 | Refrigerator |
| Kenmore | 25354703409 | Refrigerator |
| Kenmore | 2535470340A | Refrigerator |
| Kenmore | 25354713500 | Refrigerator |
| Kenmore | 25354713502 | Refrigerator |
| Kenmore | 25356943600 | Refrigerator |
| Kenmore | 25356953600 | Refrigerator |
| General Electric | 33346 | Refrigerator |
| General Electric | 33346-1 | Refrigerator |
| Frigidaire | BFHS2611LM0 | Refrigerator |
| Frigidaire | BFHS2611LM1 | Refrigerator |
| Frigidaire | BFHS2611LM2 | Refrigerator |
| Frigidaire | CRSE234FB0 | Refrigerator - Side-by-side |
| Frigidaire | CRSE234FB1 | Refrigerator - Side-by-side |
| Frigidaire | CRSE234FB2 | Refrigerator - Side-by-side |
| Frigidaire | CRSE234FB3 | Refrigerator - Side-by-side |
| Frigidaire | CRSE234FB4 | Refrigerator - Side-by-side |
| Frigidaire | CRSE234FSM0 | Refrigerator - Side-by-side |
| Frigidaire | CRSE234FSM1 | Refrigerator - Side-by-side |
| Frigidaire | CRSE234FSM2 | Refrigerator - Side-by-side |
| Frigidaire | CRSE234FSM3 | Refrigerator - Side-by-side |
| Frigidaire | CRSE234FSM4 | Refrigerator - Side-by-side |
Mail-In Recycling Rebate
Some of the parts we sell are eligible for mail-in rebates since we can recycle them. We will display any applicable rebates in your shopping cart. To redeem your rebate, contact Customer Service after you have received your part.


