Part Location Diagram of 279457 Whirlpool Dryer Heating Element Wire Kit
See part 15 in the diagram
Replacing your Whirlpool Dryer Dryer Heating Element Wire Kit
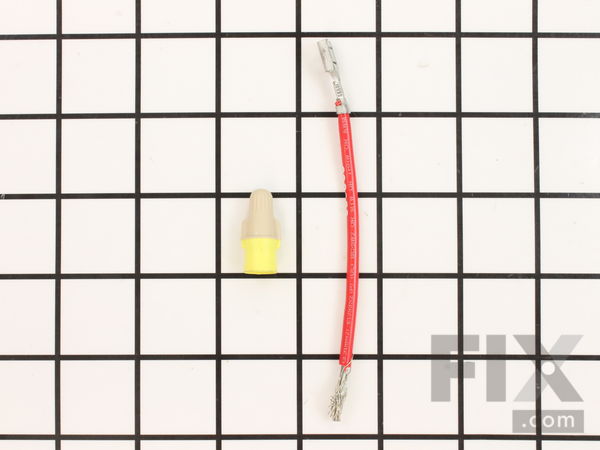
( Grid squares measure 1x1 inch )

Dryer Heating Element Wire Kit 279457

Works With Model 10686294140!

Rated by 8 customers 

?

Really Easy 

15 - 30 mins 

Ratings submitted by customers like you who bought this part.

?
$10.89
In Stock
Fix Number:
FIX334206
Manufacturer #:
279457
Manufactured by:
Whirlpool
Works With Model 10686294140!

Product Description

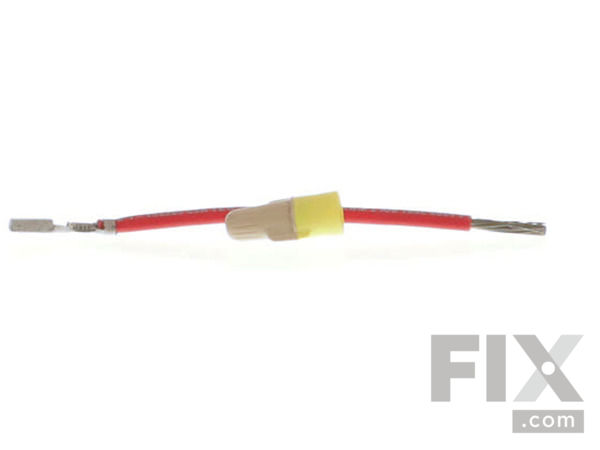
This heating element connection wire kit is a genuine OEM replacement for your electric dryer. The kit is used to connect the thermostat to the heater element. The kit comes with a yellow wire nut and a wire that measures approximately 5 inches in length. If your dryer is getting little to no heat, or is taking too long to dry, you may need to replace this connection wire. Please be sure to disconnect the power supply to your dryer before replacing this part.

Videos For installing this part.

Replacing your Dryer Heating Element Wire Kit

Replacing your Dryer Heating Element Wire Kit

Questions and Answers

We're sorry, but our Q&A experts are temporarily unavailable.
Please check back later if you still haven't found the answer you need.

Installation Instructions Provided by Fix customers like you.

Average Repair Rating: 4.1 / 5.0, 8 reviews.
  • 1
Sort by:
Sorry, we couldn't find any existing installation instruction that matched.
Customer:
dave from COLCHESTER, VT
Parts Used:
WP8577274, WP8544771, WP3392519, WP3391914, 279973, 279457
Difficulty Level:
Really Easy
Total Repair Time:
30 - 60 mins
Tools:
Nutdriver, Socket set
no heat
no owners manual fount, local service was weeks out & 100.00 to look at it.Pulled dry out,removed back cover & top, found technical repair manual inside ! found & retrieve codes.Looking for parts stumbled onto your great web site, ordered all possible parts you listed. spent 175.00 fixed,re assemble within 1 hr. HAPPY-HAPPY. HAPPY-WIFEY -HAPPY-LIFEY !!
14 of 14 people found this instruction helpful.
Was this instruction helpful to you?
Thank you for voting!
Customer:
Sheryl from North Little Ro, AR
Parts Used:
279769, 279457
Difficulty Level:
Really Easy
Total Repair Time:
Less than 15 mins
Tools:
Nutdriver
Dryer ran, but without heat.
offered a youtube video for the repair. My dryer looked a little different, but the parts were the same. When I ordered a thermostat button, I noticed a wire kit, too. Both parts showed to be 95% most common repairs for problem. Sure enough, I needed BOTH parts. I had a burnt wire, and the thermostat button adjacent to the burnt wire was out, too. Thanks for the info; you saved me a lot of time by providing this information! I just clipped the burnt wire, removed 1/2" of casing and joined the new wire end to the rest of the wire with the wire nut provided. The button was attached with two hex-head screws, so I removed them with the nut driver, removed the wires and plugged them into the new part and screwed it back in place. Plugged the dryer back in and had heat again!
6 of 7 people found this instruction helpful.
Was this instruction helpful to you?
Thank you for voting!
Customer:
micah from CLOQUET, MN
Parts Used:
279769, 279457
Difficulty Level:
Easy
Total Repair Time:
30 - 60 mins
Tools:
Nutdriver, Pliers, Screw drivers, Socket set
My dryer ran but with no heat.
First, remove the front panel just below the door. To do this, tip the dryer back a little. You can then see how the two clips on the top and the two on the bottom work. Now remove the forwardmost tubing by removing the two screw holding it in place. Next, remove the panel in front of the housing holding the heating element, high temperat ure fuse, and the thermal cut-off(Three of the four components that may be your problem. All of these can be tested with a multimeter on ohms. As can your fourth item located on the housing behind the heating tube previously removed. This item is your high temperature thermostat. If there is infinite resistance, the part is bad.). Disconnect the six wires connected to the components inside the heating element. Now, remove the housing by twisting right 45 degrees and then lifting up and to the right. From this point the removal and replacement is obvious. Now when I removed my housing, one of my wire ends was corroded and broke, so I needed to buy the above end and replace it. The end comes with instructions.
1 person found this instruction helpful.
Was this instruction helpful to you?
Thank you for voting!
Customer:
Kevin from Acworth, GA
Parts Used:
WPW10044440, 279457
Difficulty Level:
Easy
Total Repair Time:
30 - 60 mins
Tools:
Nutdriver, Screw drivers, Socket set
No heat
Disconnected power disconnect belt pullout tub and replace heat element.
1 of 2 people found this instruction helpful.
Was this instruction helpful to you?
Thank you for voting!
Customer:
henry from bronx, NY
Parts Used:
279570, 279457
Difficulty Level:
Very Easy
Total Repair Time:
15 - 30 mins
Tools:
Socket set
my unit would not stop when i opened the door,and the unit was not heating to my expectations.
by watching the short video that was sent with my purchase. it was over in less then 30 minutes, since my unit had another task which was not on the video,removing the exhaust tube to remove the back panel.I will be looking close to my other appliences in the future for help from this site ,great experience!
1 of 2 people found this instruction helpful.
Was this instruction helpful to you?
Thank you for voting!
Customer:
Patty from West Plains, MO
Parts Used:
279838, 279457
Difficulty Level:
Really Easy
Total Repair Time:
30 - 60 mins
Tools:
Screw drivers, Socket set
Heating Element had gone out
I went online and got installation instructions for an Estate dryer. They had pictures and written instructions.
0 of 1 people found this instruction helpful.
Was this instruction helpful to you?
Thank you for voting!
Customer:
Johnnie l from Greentown, PA
Parts Used:
279838, 279457
Difficulty Level:
Very Easy
Total Repair Time:
Less than 15 mins
Tools:
Nutdriver
no heat
removed back panel and then removed two screws to the heating element
0 of 1 people found this instruction helpful.
Was this instruction helpful to you?
Thank you for voting!
Customer:
Carol from Canyon Lake, TX
Parts Used:
279838, 279457
Difficulty Level:
Really Easy
Total Repair Time:
15 - 30 mins
Tools:
Screw drivers, Socket set
Clothes dryer did not heat
replaced heating element, took about 30 min from start to finish, works great now. Very easy, jut took off the back panel of the dryer and took out the bad heating element and replaced it with the new one. simple as 1-2-3
0 of 1 people found this instruction helpful.
Was this instruction helpful to you?
Thank you for voting!
  • 1

Model Compatibility

This part works with the following models:
Fix Number: FIX334206
Manufacturer Part Number: 279457
Brand Model Number Description
Kenmore 10686294140 Dryer
Kenmore 10686294340 Dryer
Kenmore 10686294540 Dryer
Kenmore 10686294740 Dryer
Kenmore 10686294840 Dryer
Kenmore 10687884100 Dryer
Kenmore 10687884300 Dryer
Kenmore 10687884600 Dryer
Kenmore 10688419100 Dryer
Kenmore 10688419300 Dryer
Roper 1093B1A Wall Oven - Range (gas)*
Kenmore 110088732791 Washer Dryer Combo
Kenmore 1101820299 Washer Dryer Combo - WASHER DRYER LAUNDRY SYSTEM
Kenmore 11060012000 Dryer
Kenmore 11060012001 Dryer
Kenmore 11060012002 Dryer
Kenmore 11060022010 Dryer
Kenmore 11060052990 Dryer
Kenmore 11060052991 Dryer
Kenmore 11060056990 Dryer
Kenmore 11060056991 Dryer
Kenmore 1106007299 Dryer - Kenmore Dryer Model 110.6007299 (1106007299, 110 6007299) Parts
Kenmore 11060072990 Dryer
Kenmore 11060072991 Dryer
Kenmore 11060092990 Dryer
Kenmore 11060092991 Dryer
Kenmore 11060094990 Dryer
Kenmore 11060094991 Dryer
Kenmore 11060096990 Dryer
Kenmore 11060096991 Dryer