General Electric Range Parts
Find Parts Fast
Guaranteed Fit
Repair Videos


Popular General Electric Range Parts
- Fix Number
- FIX470125
- Manufacturer Part Number
- 5303935058
Fixes these symptoms
- Element will not heat
- Oven not heating evenly
- Will Not Start
- See more...
Installation Instructions
SHIRLEY O from boxborough, MA
burner would not heat
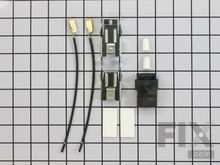
removed burners, cut wires to each burner, installed new wires from terminal block kit. reinstalled surface element. Followed directions from video located at site of the ordered items
Read more...
- Fix Number
- FIX2339242
- Manufacturer Part Number
- 316442301
Fixes these symptoms
- Element will not heat
- Will Not Start
- See more...
Installation Instructions
SHIRLEY O from boxborough, MA
burner would not heat
removed burners, cut wires to each burner, installed new wires from terminal block kit. reinstalled surface element. Followed directions from video located at site of the ordered items
Read more...
- Fix Number
- FIX11729102
- Manufacturer Part Number
- WB24X25013
Fixes these symptoms
- Element will not heat
- See more...
- Fix Number
- FIX12751166
- Manufacturer Part Number
- 316538904
Installation Instructions
Jeffrey from SEATTLE, WA
Bake element replacement
1. Turn of over power at the breaker.2. Remove bake element cover. There's 2 quarter inch nuts.
3. Disconnect old element. For me there was not much play in the wires so when I disconnected the old element I lost the wire in the insulation. If this happened you can remove the central plate cover on the back of the oven and you can easily find the wires again.
4. Connect the replacement element.
5. Screw the bake element cover back in.
6. Turn power back on. Read more...
- Fix Number
- FIX244394
- Manufacturer Part Number
- WB31T10010
Installation Instructions
Chris from Lillington, NC
Broken bake element & light bulb
Turned of the power at the fuse box as the oven was hard wired to the electrical source and then removed the old element via the screws at the back of the oven. Disconnected the wires from the element and then reconnected those to the new element. Screwed the element base to the back wall of the oven and then replaced the light bulb.
Read more...
- Fix Number
- FIX244395
- Manufacturer Part Number
- WB31T10011
Fixes these symptoms
- Element will not heat
- See more...
Installation Instructions
Jeffrey from SEATTLE, WA
Bake element replacement
1. Turn of over power at the breaker.2. Remove bake element cover. There's 2 quarter inch nuts.
3. Disconnect old element. For me there was not much play in the wires so when I disconnected the old element I lost the wire in the insulation. If this happened you can remove the central plate cover on the back of the oven and you can easily find the wires again.
4. Connect the replacement element.
5. Screw the bake element cover back in.
6. Turn power back on. Read more...
- Fix Number
- FIX217532
- Manufacturer Part Number
- 40A15
Installation Instructions
Jeffrey from SEATTLE, WA
Bake element replacement
1. Turn of over power at the breaker.2. Remove bake element cover. There's 2 quarter inch nuts.
3. Disconnect old element. For me there was not much play in the wires so when I disconnected the old element I lost the wire in the insulation. If this happened you can remove the central plate cover on the back of the oven and you can easily find the wires again.
4. Connect the replacement element.
5. Screw the bake element cover back in.
6. Turn power back on. Read more...
- Fix Number
- FIX2339241
- Manufacturer Part Number
- 316442300
Fixes these symptoms
- Element will not heat
- Will Not Start
- See more...
Installation Instructions
Mike from Buffalo, NY
Replaced accessories for top of electric range
I was simple. Using this site online afforded me the opportunity to conveniently replace accessories that were in bad shape. I will always use this site for my self-installation needs in the future. Mike , NY
Read more...
- Fix Number
- FIX8754845
- Manufacturer Part Number
- WB31K10265
Installation Instructions
Robert from Snoqualmie, WA
The old drip pans had burned in residue and could not be cleaned.
I simply removed the burners and drip pans and replaced the drip pans with the replacement parts. The replacement parts fit better than the original parts. The burner did not fit well in the old drip pans and the pans did not sit level on the burners.The new drip pans are perfect even to the slots to accommodate one of the legs on the burner.
Read more...
- Fix Number
- FIX236750
- Manufacturer Part Number
- WB24T10025
Fixes these symptoms
- Element will not heat
- Oven is too hot
- Will Not Start
- See more...
Installation Instructions
Bryant from CAMDENTON, MO
Burner would not keep even heat. One moment was at low heat then surges to very high heat without touching the burner control.
Step 1: disconnected power Step 2: removed upper rear panel Step 3: removed control knob Step 4: removed two screws Step 5: plugged in wires from old unit to new unit. Step 6: reinstall new control and tighten two screws Step 7: reinstall control knob.
Read more...
General Electric Range Appliance Types
Related General Electric Range Parts
- General Electric Range Brackets and Flanges
- General Electric Range Caps and Lids
- General Electric Range Circuit Boards and Touch Pads
- General Electric Range Cooktops
- General Electric Range Doors
- General Electric Range Drawers and Glides
- General Electric Range Drip Bowls
- General Electric Range Electronics
- General Electric Range Elements and Burners
- General Electric Range Filters
- General Electric Range Fuses
- General Electric Range Glass Trays and Supports
- General Electric Range Grates
- General Electric Range Handles
- General Electric Range Handles and Latches
- General Electric Range Hardware
- General Electric Range Hinges
- General Electric Range Igniters
- General Electric Range Ignitions
- General Electric Range Insulation
- General Electric Range Knobs
- General Electric Range Latches
- General Electric Range Legs and Feet
- General Electric Range Lights and Bulbs
- General Electric Range Motors
- General Electric Range Racks
- General Electric Range Seals and Gaskets
- General Electric Range Sensors
- General Electric Range Springs and Shock Absorbers
- General Electric Range Switches
- General Electric Range Thermostats
- General Electric Range Trays and Shelves
- General Electric Range Trim
- General Electric Range Valves
- General Electric Range Wire Plugs and Connectors
Popular General Electric Range Models
- CGS980SEM1SS Gas
- C2S980SEM1SS Dual Fuel
- JBS55DM2WW Electric
- PS978ST1SS
- JS750SF3SS ELECTRIC RANGE
- JB250DF1WW
- JB850SF1SS
- JB850ST1SS
- JBP23DN1WW
- JB650SF1SS
- JBP24BB4WH Electric
- PS950SF3SS ELECTRIC RANGE
- JBP64BB4WH Electric
- JBP23DR2WW
- PGB918SEM1SS Gas
- JBP23DR3WW
- PB975SM2SS Electric
- JGBS66REK1SS GAS RANGE
- JB645RK1SS ELECTRIC RANGE
- JBS55DM2BB Electric


