


Models
>
MISC
MISC Bosch Miscellaneous
Jump to:
Find Part by Name
Keep searches simple, eg. "belt" or "pump".
Diagrams for MISC
Viewing 1 of 1
Keep searches simple, eg. "belt" or "pump".

In Stock
Order within the next 8 hrs and your part ships today!

$5.19
This is an OEM coupling for multi-tools. It connects the armature and drive shaft. It also acts as a safeguard to the motor, by preventing it from burning if the drive shaft malfunctions. If your tool...
On Order

This OEM part includes two carbon brushes. This is a part that commonly wears with time and should be inspected as part of your regular maintenance checks. Even if only one appears worn, they should b...
No Longer Available


$7.45
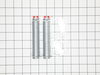
This part includes a set of two carbon brushes and two springs, sourced directly from the manufacturer. The spring bolts transmit power and hold the brush securely against the commutator. The brushes ...
In Stock
Order within the next 8 hrs and your part ships today!

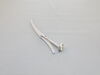
This part includes a set of two carbon brushes designed with a wire lead and brush spring attached. Due to the repetitive rubbing against the spinning commutator, they tend to deteriorate with extende...
No Longer Available

$5.15
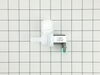
This lock assembly includes one collar and one pin. It assists in locking the spindle shift. Over time, the pin can deteriorate, which results in it slipping. The retainer can also break. For this rep...
On Order

$7.45
These OEM replacement carbon brushes are sold as a pair and include a coiled spring attached. These brush and spring assemblies are what deliver power to a rotary tool armature. The spring transfers p...
In Stock
Order within the next 8 hrs and your part ships today!

This is a genuine lever assembly for a saw. This kit is sourced right from the original manufacturer, ensuring the highest quality replacement parts. It includes the lever, retaining clip and the acor...
No Longer Available

This is a manufacturer-approved locking lever for a circular saw. The locking lever locks the saws designated height and angle of the saw. It fits over and engages with a special bolt. The spines in t...
No Longer Available
 – Part Number: 1619P02892")
This is a set of two OEM carbon brushes. If the motor of your tool is running inefficiently, one of the first parts you should check are the carbon brushes. If any signs of burning or sparks are prese...
No Longer Available

As part of your regular maintenance, the carbon brushes need to be regularly inspected and replaced according to your manufacturer instructions. This part includes two carbon brushes, and they should ...
No Longer Available
Questions and Answers
We're sorry, but our Q&A experts are temporarily unavailable.
Please check back later if you still haven't found the answer you need.
Common Problems and Symptoms for MISC
Viewing 17 of 17Leaking
Fixed by these parts


How to fix it
Not draining
Fixed by these parts

How to fix it
Door latch failure
Fixed by these parts


How to fix it
Not cleaning dishes properly
Fixed by these parts


How to fix it
Door won’t close
Fixed by these parts

How to fix it
Not drying dishes properly
Fixed by these parts
How to fix it
Won’t turn on
Fixed by these parts


How to fix it
Will not dispense detergent
Fixed by these parts


How to fix it
Will Not Start
Fixed by these parts

How to fix it
Will not drain
Fixed by these parts

How to fix it
Tray won’t turn
Fixed by these parts

How to fix it
Will not fill with water
Fixed by these parts
How to fix it
Noisy
Fixed by these parts

How to fix it
Door Pops Open
Fixed by these parts
How to fix it
Gas igniter glows, but will not light
Fixed by these parts
How to fix it
Sparking
Fixed by these parts
How to fix it
Ice maker won’t dispense ice
Fixed by these parts

How to fix it


Keep searches simple. Use keywords, e.g. "leaking", "pump", "broken" or "fit".
- Customer:
- Patricia from DALLAS, TX
- Parts Used:
- 20000533
- Difficulty Level:
- Very Easy
- Total Repair Time:
- Less than 15 mins
A prong in the bottom rack had broken nearly through where it attached to the base & was rusting severely. Several other prongs had also started to rust.
The bottom rack of our Bosch dishwasher was discontinued & no longer available anywhere, so we ordered an OEM replacement rack from PartSelect.com & hoped that it would fit.
The new rack fits perfectly & is actually an improvement over the old one. The new rack doesn't have a vase tower, but that is actually a big design impr ... Read more ovement because it can store more dishes & is more flexible than the old one. The new rack comes without a handle cover, but it was very easy to move the handle cover from our old rack to the new one.
The new rack fits perfectly & is actually an improvement over the old one. The new rack doesn't have a vase tower, but that is actually a big design impr ... Read more ovement because it can store more dishes & is more flexible than the old one. The new rack comes without a handle cover, but it was very easy to move the handle cover from our old rack to the new one.
Read less
Was this instruction helpful to you?
Thank you for voting!
- Customer:
- Raymond from VIENNA, VA
- Parts Used:
- 10023852
- Difficulty Level:
- Easy
- Total Repair Time:
- 30 - 60 mins
- Tools:
- Pliers
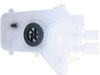
E:15 error code with Watertap
The E:15 error code means water is detected in the pan under the unit. There are several ways this can happen.
In this case, it was caused by a bad inlet valve. It did not close properly and led to an overflow of water inside that eventually spilled into the pan underneath the unit.
I see now why the pump keeps run ... Read more ning after this error. In this case, it would have led to a big flood in the kitchen if it did not.
I was actually able to run the unit while broke by manually operating the valve under our sink that provides water to the unit.
Be sure to turn off breaker before servicing. Don't get shocked!
Be sure to turn off water before starting! Or, you'll have a flood.
Anyway, I just pulled the unit out (was secured by 2 screws on the sides). I lifted up the insulation material on the left side to get at the valve. Pushed a little green tab to release the electrical plug. Then, use pliers to move clamp off the white water hose on the inside. Then, pull of white hose. This was hard in my case. Took a lot of force. Then, reach behind the unit and use pliers to unscrew water hose. Now, the whole gray panel there can pop out with some force. Then, slip the old valve out and slip new one in. Reconnect hoses and clamp. Note that I put some caulk on the connector where white hose goes. Not sure if needed or not.
Good luck!
Read less
Was this instruction helpful to you?
Thank you for voting!
- Customer:
- Steven from SUWANEE, GA
- Parts Used:
- 00490467
- Difficulty Level:
- A Bit Difficult
- Total Repair Time:
- 30 - 60 mins
- Tools:
- Screw drivers
Spring assembly on detergent and rinse aid dispenser broke so the sliding lid would not operate
Here are the steps you need to take to do the job properly:
1. turn off electrical circuit breaker to the dishwasher
2. remove 8 total hex screws (3 on each side and 2 at the top) of the inside door panel. The door panel will slide off so be careful and it happens pretty quickly when the last hex screw is removed.
3 ... Read more . unplug the wiring harness to the detergent/rinse aid dispenser
4. you need to use a flat head screw driver to lift the metal flanges on the top and bottom of the detergent/rinse aid dispenser.
5. the unit will pop out toward the inside of the dishwasher
6. insert the new detergent rinse/aid dispenser and very important all metal flanges are pulled back over the plastic edge (top and bottom) of the dispenser unit. The screw driver needs to be used to assist in pushing the dispenser unit as tight to the frame of the door to ensure the metal flanges grab hold and lock in.
7. re-attach the wiring harness
8. re-install the dishwasher door with 8 hex screws. Doing this step alone is challenging as the door frame will want to keep going up to close. I used a small foot stool and placed it inside the dishwasher front area on top of the inside metal door area so the door would stay open roughly half way. I then used my knees to prop up the outer door cover while i got 2 screws started then was able to easily complete the job.
9. run the dishwasher with a detergent packet loaded into your new dispenser. I checked for 15-20 minutes during initially running to insure no issues or leaks.
10. One last note - my Bosch dishwasher had a custom wood door installed to the outer panel to blend in with our kitchen cabinets. The door itself was much heavier as a result. Some of you may not experience the slight difficulty i noted above in step 8. Good luck.
Read less
Was this instruction helpful to you?
Thank you for voting!