


Models
>
MMV5207AAQ
MMV5207AAQ Maytag Microwave
Jump to:
Find Part by Name
Keep searches simple, eg. "belt" or "pump".
Diagrams for MMV5207AAQ
Viewing 7 of 7


.gif "SUPPLEMENTAL INFORMATION Diagram and Parts List for Maytag Microwave")
Manuals & Guides for MMV5207AAQ
Click to downloadKeep searches simple, eg. "belt" or "pump".

$8.36
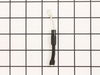
To access the exterior lightbulb, the bottom panel of the microwave will need to be removed. It is secured in place with screws, so will require a Philips screwdriver to remove it. Screw the new light...
In Stock
Order within the next 1 hr and 56 mins and your part ships today!


$43.92
This part is the replacement halogen lamp for your range hood. The bulb is 35 watts and 130 volts. The halogen lamp lights up the area under the range hood so you can see the cooktop more effectively ...
In Stock
Order within the next 1 hr and 56 mins and your part ships today!

In Stock
Order within the next 1 hr and 56 mins and your part ships today!

In Stock
Order within the next 1 hr and 56 mins and your part ships today!

$29.87
This is the replacement charcoal filter for your microwave. It is black in color and measures approximately 11 inches by 2 ½ inches. The charcoal filter removes cooking odors from the air that circul...
In Stock
Order within the next 1 hr and 56 mins and your part ships today!

$86.57
This kit contains 2 switches - 15 Amp - 125/250 Volt with 3/16" terminals.
In Stock
Order within the next 1 hr and 56 mins and your part ships today!

This rivet is used for the stirrer cover/wave guide. They are sold individually.
In Stock
Order within the next 1 hr and 56 mins and your part ships today!


In Stock
Order within the next 1 hr and 56 mins and your part ships today!

In Stock
Order within the next 1 hr and 56 mins and your part ships today!
Questions and Answers
We're sorry, but our Q&A experts are temporarily unavailable.
Please check back later if you still haven't found the answer you need.
Common Problems and Symptoms for MMV5207AAQ
Viewing 3 of 3No heat
Fixed by these parts


How to fix it
Won’t turn on
Fixed by these parts

How to fix it
Doesn’t shut off
Fixed by these parts
How to fix it


Keep searches simple. Use keywords, e.g. "leaking", "pump", "broken" or "fit".
- Customer:
- Deborah from Millersville, MD
- Parts Used:
- 8206232A
- Difficulty Level:
- Difficult
- Total Repair Time:
- Less than 15 mins
- Tools:
- Screw drivers
light bult needed to be replaced
The nightmare was that this microwave is installed under the cabinet....in order to get to the light bulb I had to pull out my stove then squeeze into the space between the stove and counter....my old microwave light bult was much easier to change.....Shame on Whirlpool for making this so difficult.....must be a better way to cover the li
... Read more
ght bulb so that we do not need a screwdriver to remove the door to get to the light bulb
Read less
Was this instruction helpful to you?
Thank you for voting!
- Customer:
- Joseph from Pembroke, MA
- Parts Used:
- 8206232A
- Difficulty Level:
- Really Easy
- Total Repair Time:
- Less than 15 mins
- Tools:
- Screw drivers
Bulb "burnt out"
Removed 1 screw, removed "burnt out" bulb and replaced it with new bulb.
Was this instruction helpful to you?
Thank you for voting!
- Customer:
- Robert from Bainbridge Island, WA
- Parts Used:
- 4392027
- Difficulty Level:
- A Bit Difficult
- Total Repair Time:
- 30 - 60 mins
- Tools:
- Pliers, Screw drivers
Microwave worked intermittently depending on how door was closed
Remove top grille (2 screws), undo control panel (1 screw). Tilt down control panel, switches are on the left. There are actually three switches that are involved with the door, two horizontally mounted, one vertically mounted. This would be an EASY REPAIR, but it took me a while to figure out which of the three switches was bad, and a
... Read more
lso took a while to figure out that there is a plastic rod that inserts through the hole in the switch body. Once i figured this out went like a breeze. Lower horizontal switch was the bad one, but since the kit came with two switches i went ahead and replaced the upper horizontal one as well. IT appears that the horizontal switches are probably more likely to fail than the vertical switch based on the position of the switch and force angles. Works great now!
Read less
Was this instruction helpful to you?
Thank you for voting!