


Models
>
AEM407L
AEM407L Speed Queen Dryer
Jump to:
Find Part by Name
Keep searches simple, eg. "belt" or "pump".
Diagrams for AEM407L
Viewing 12 of 12


 Diagram and Parts List for Speed Queen Dryer")
 Diagram and Parts List for Speed Queen Dryer")


Keep searches simple, eg. "belt" or "pump".

$20.87
If your dryer is not tumbling, takes a long time to dry, or is noisy while tumbling, it may be time to replace the drum support rollers. These hold the drum in place while it rotates, so if they have ...
In Stock

$9.88
The multi rib belt, which may also be called a dryer drum belt or a multi-v belt, helps to rotate the drum of the dryer. The belt wraps completely around the drum, around a tension pulley, and then ar...
In Stock

$14.12
Located in the front bulkhead of your dryer are two drum glides, which help to ensure that the drum rotates smoothly and quietly while the dryer is operating. When the glides wear down, it can cause a...
In Stock

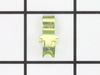
This two inch wide idler pulley wheel is beige in color and is made of plastic. This pulley wheel comes with its own metallic bearing in its center.
In Stock

$12.91
Meant as a backup to a high limit thermostat, this fuse is typically set to trip at a higher temperature than that of a high limit thermostat. This is a one-time use fuse, so when it does trip, you do...
In Stock

In Stock

$35.56
The spring for this part is sold separately.
This idler assembly is for dryers.
Idler assembly includes the idler arm and the idler pulley that maintains tension on the drive belt, allowing the ...
In Stock

$14.17
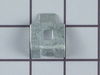
This metal retaining ring is well under an inch long. Use it for your Maytag brand clothes washer or your clothes dryer.
In Stock

In Stock

$50.78
This part is located between the back of the drum and the rear dryer panel.
In Stock

This dryer drum glide pad is an inch long. It is made of a felt material and is used for gas and electric clothes dryers.
In Stock

$5.61
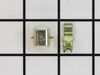
This is a multi-use screw and can be used on a variety of appliances. The measurements of the screw are: 8/18 x 3/8. *Please note: the screw is sold individually. Refer to the manual provided by the m...
In Stock
Questions and Answers
We're sorry, but our Q&A experts are temporarily unavailable.
Please check back later if you still haven't found the answer you need.
Common Problems and Symptoms for AEM407L
Viewing 10 of 10Noisy
Fixed by these parts


How to fix it
Door won’t close
Fixed by these parts
How to fix it
Drum Not Spinning
Fixed by these parts


How to fix it
Marks left on clothes
Fixed by these parts


How to fix it
Too hot
Fixed by these parts


How to fix it
Won’t Start
Fixed by these parts

How to fix it
Not Heating
Fixed by these parts
How to fix it
Will not agitate
Fixed by these parts

How to fix it
Door Pops Open
Fixed by these parts
How to fix it
Burning smell
Fixed by these parts
How to fix it


Keep searches simple. Use keywords, e.g. "leaking", "pump", "broken" or "fit".
- Customer:
- Steven from Holderness, NH
- Parts Used:
- WP40113601, WP37001287, WP37001042, WP500121
- Difficulty Level:
- Easy
- Total Repair Time:
- 1- 2 hours
- Tools:
- Screw drivers, Socket set
Squeeling and grinding noise
Wasn't the belt!! Changed it anyway. Should have come here earlier. That mistake added several days to the repair waiting for a second batch of the right parts. Became a pro at taking the dryer apart and reassembling, though! Easy job, just take your time and mark your wires, if you need to.
Followed other people's excellent instru ... Read more ctions. Clean out all the dust bunnies. Schematics were a great resource. Those and the prices made me a repeat customer.
The shaft of the Idler Lever wheel was the cause, but decided, since I had it apart, to spend a little more money and replace both Drum Support Rollers and the Roller Bracket and Shaft Assembly. They showed some wear, and the parts were very inexpensive. Make sure you have snap ring pliers with prongs that are smaller than the standard 0.40 to save some aggravation with the Drum Rollers. $5 tool. Total parts were less than $60. Probably saved $150+ in labor. Quieter than ever now. Thanks!
Read less
Was this instruction helpful to you?
Thank you for voting!
- Customer:
- Robert from Skokie, IL
- Parts Used:
- WP40111201
- Difficulty Level:
- Difficult
- Total Repair Time:
- 1- 2 hours
- Tools:
- Nutdriver
Replace drive belt
Remove front panel, lint basket, motor mounts,exhaust hood, front drum brackets. Then slip serpentine belt around drum, pressure w/ tension idler pulley and slip around drive motor spindle. Replace all parts in reverse order (a two person job).
Vacuumed inside of dryer (full of lint.)
Vacuumed inside of dryer (full of lint.)
Was this instruction helpful to you?
Thank you for voting!
- Customer:
- William from Round Mountain, NV
- Parts Used:
- WPY54414, WP40113601, WP37001042
- Difficulty Level:
- A Bit Difficult
- Total Repair Time:
- 1- 2 hours
- Tools:
- Nutdriver, Socket set
Squeeling/Screeching
First I read all of the other stories about this problem so I would have the correct parts. At $6 a roller, decided to get all 3 & a belt. Pulled the lower panel off (2 bolts), then the door (2 bolts). Marked the door switch wires. Took 2 bolts out of the top & tilted it back. I found this the easiest way to access the drum. Mark 2 wires
... Read more
before disconnecting them from the top. All bolts are 5/16". Removed the plastic piece that connects the lint trap to the blower (3 screws). Have to access these from inside the drum. Removed the belt, then the drum. The bad roller was the belt tension roller. Can't get to the snap ring from the front of the dryer for this roller. The 2 rollers in the back you can get to without removing the drum completely. Very easy to replace all rollers with the drum out. Also very easy to re-assemble. Buy or borrow a good set of snap ring pliers. Make sure you diagram the proper belt route if you don't have a picture. I printed a picture off this web site. Have someone hold the drum up so you can get the belt on, otherwise the entire repair is a 1 person job. Went back together in about 10 minutes. Total cost $40.00 parts & shipping.
Read less
Was this instruction helpful to you?
Thank you for voting!